
Rediscovering the Negative: Why I Scan My Own Film
In the days of the darkroom, one thing was clear:
Every print was an interpretation.
Contrast, exposure time, paper choice, dodging, burning — each step was a creative decision. The negative was never the final result. It was the beginning of a process, a map to be interpreted by hand and eye.
But somewhere along my return to film — what I now call my digital detox photography — I forgot that.
The Lab Scan Illusion
Like many photographers rediscovering film, I assumed a professional lab scan was the best possible outcome — some kind of objective truth of what my negative contained.
Clean curves. High-end Noritsu or Frontier scans. Digital perfection.
But the truth?
A lab scan is someone else’s interpretation of your negative.
Here’s what I began to notice:
- Some highlights were blown out, shadows lifted — but not how I saw or remembered the scene
- Grain was smoothed over or exaggerated based on technician taste
- Black & white tones felt foreign — flat or overly digital
- Even small image details were missing — like a single leaf that disappeared entirely
These were not bad scans.
They were just not my scans — not what I would have created in the darkroom.
Remembering My Darkroom Roots
It took a few test rolls and a lot of confusion to finally say it out loud:
“Wait — this isn’t wrong… it’s just not mine.”
That realization pulled me back — not to a physical darkroom, but a mental one.
Back to interpretation.
Back to the zone system.
Back to owning the entire process, from exposure to final output.
My Findings
The turning point came while preparing photos for my first zine. I started going back to the negatives, comparing my earlier lab scans with fresh scans I made using my Epson V800.
The difference? Shocking.
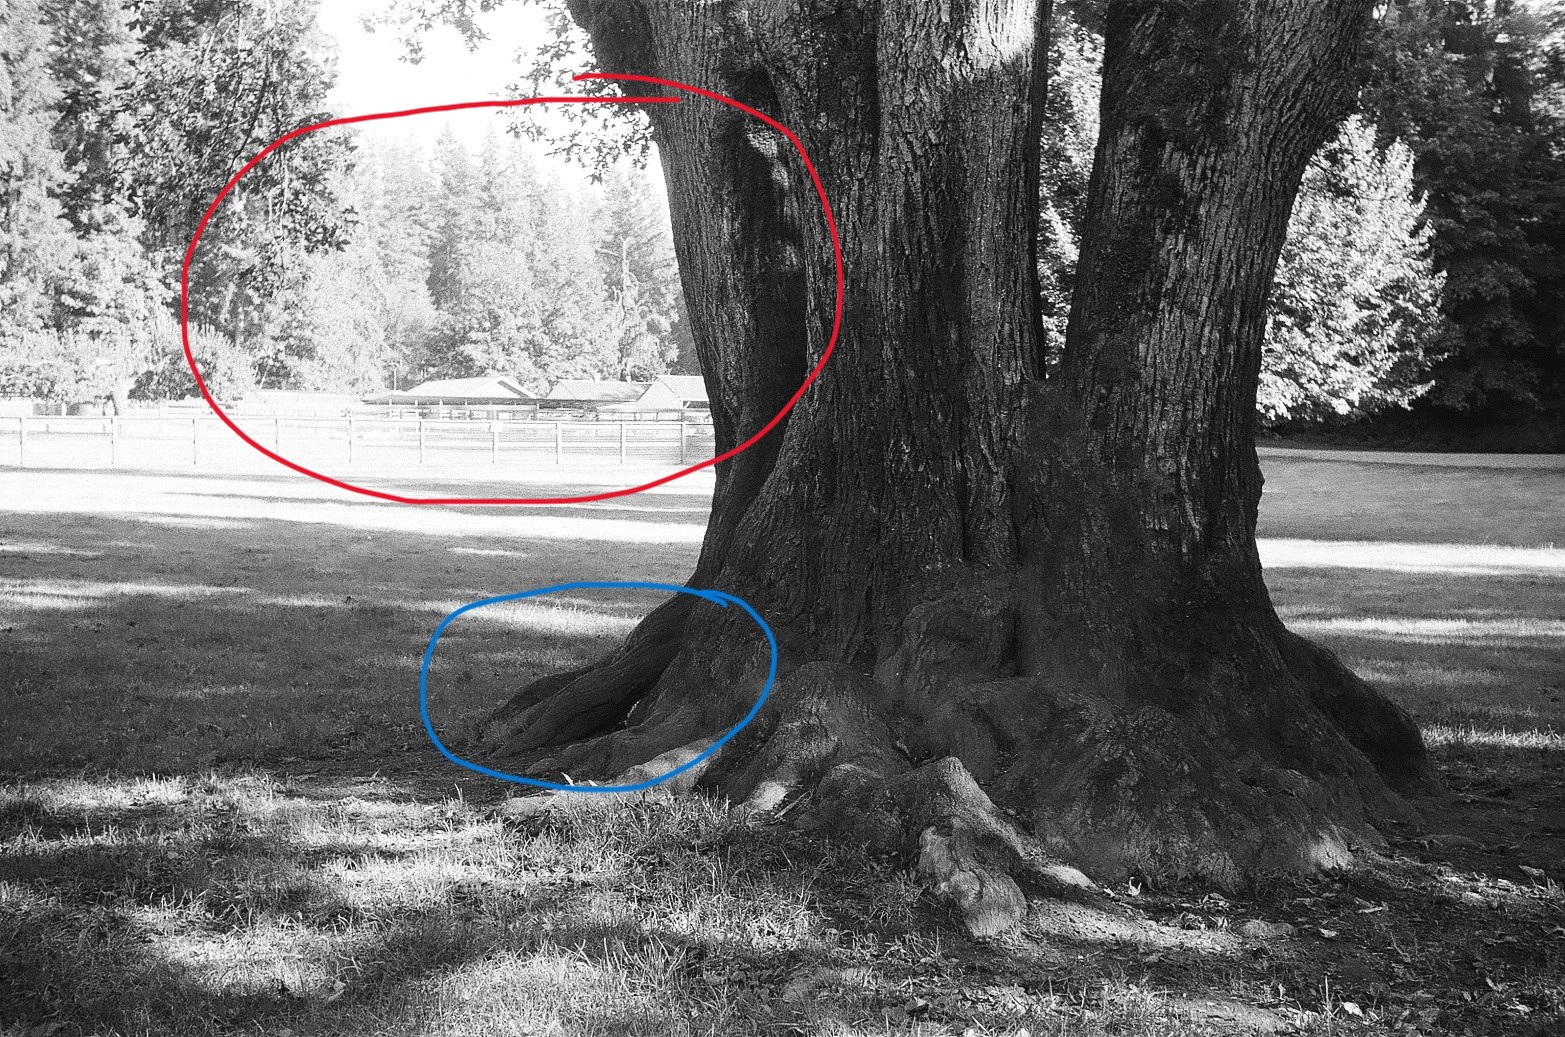
Lab vs My Interpretation
Below:
Left = Lab scan
Right = My scan after realizing something was wrong — yes, that leaf is missing in the lab version.
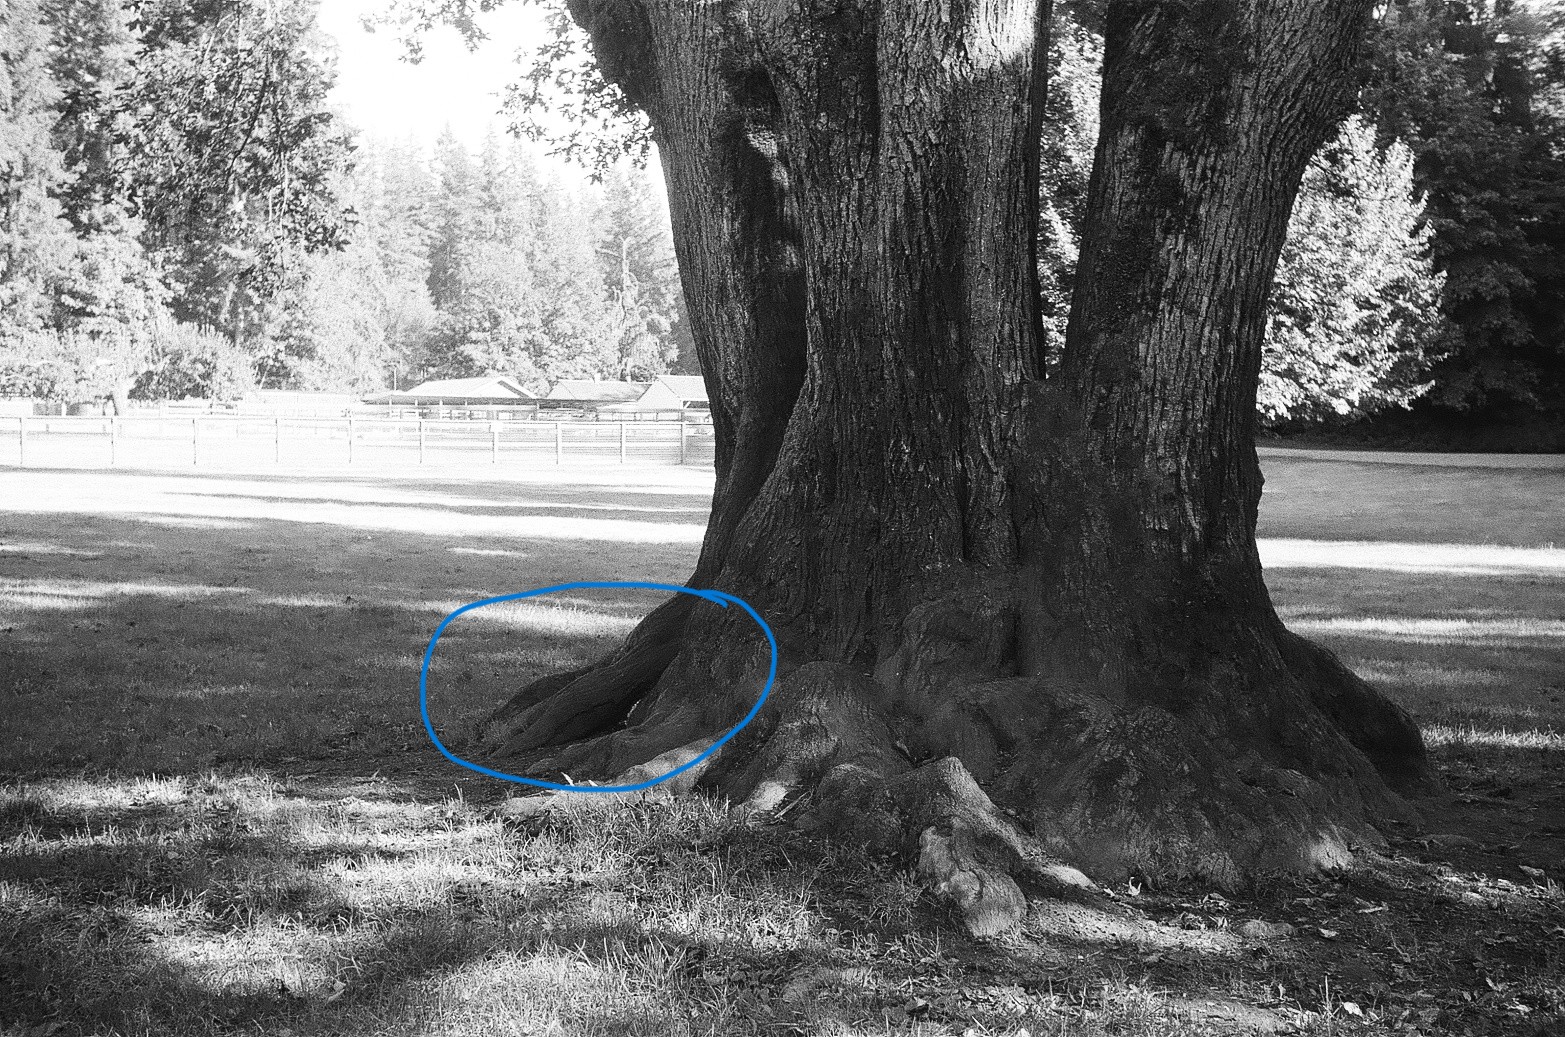
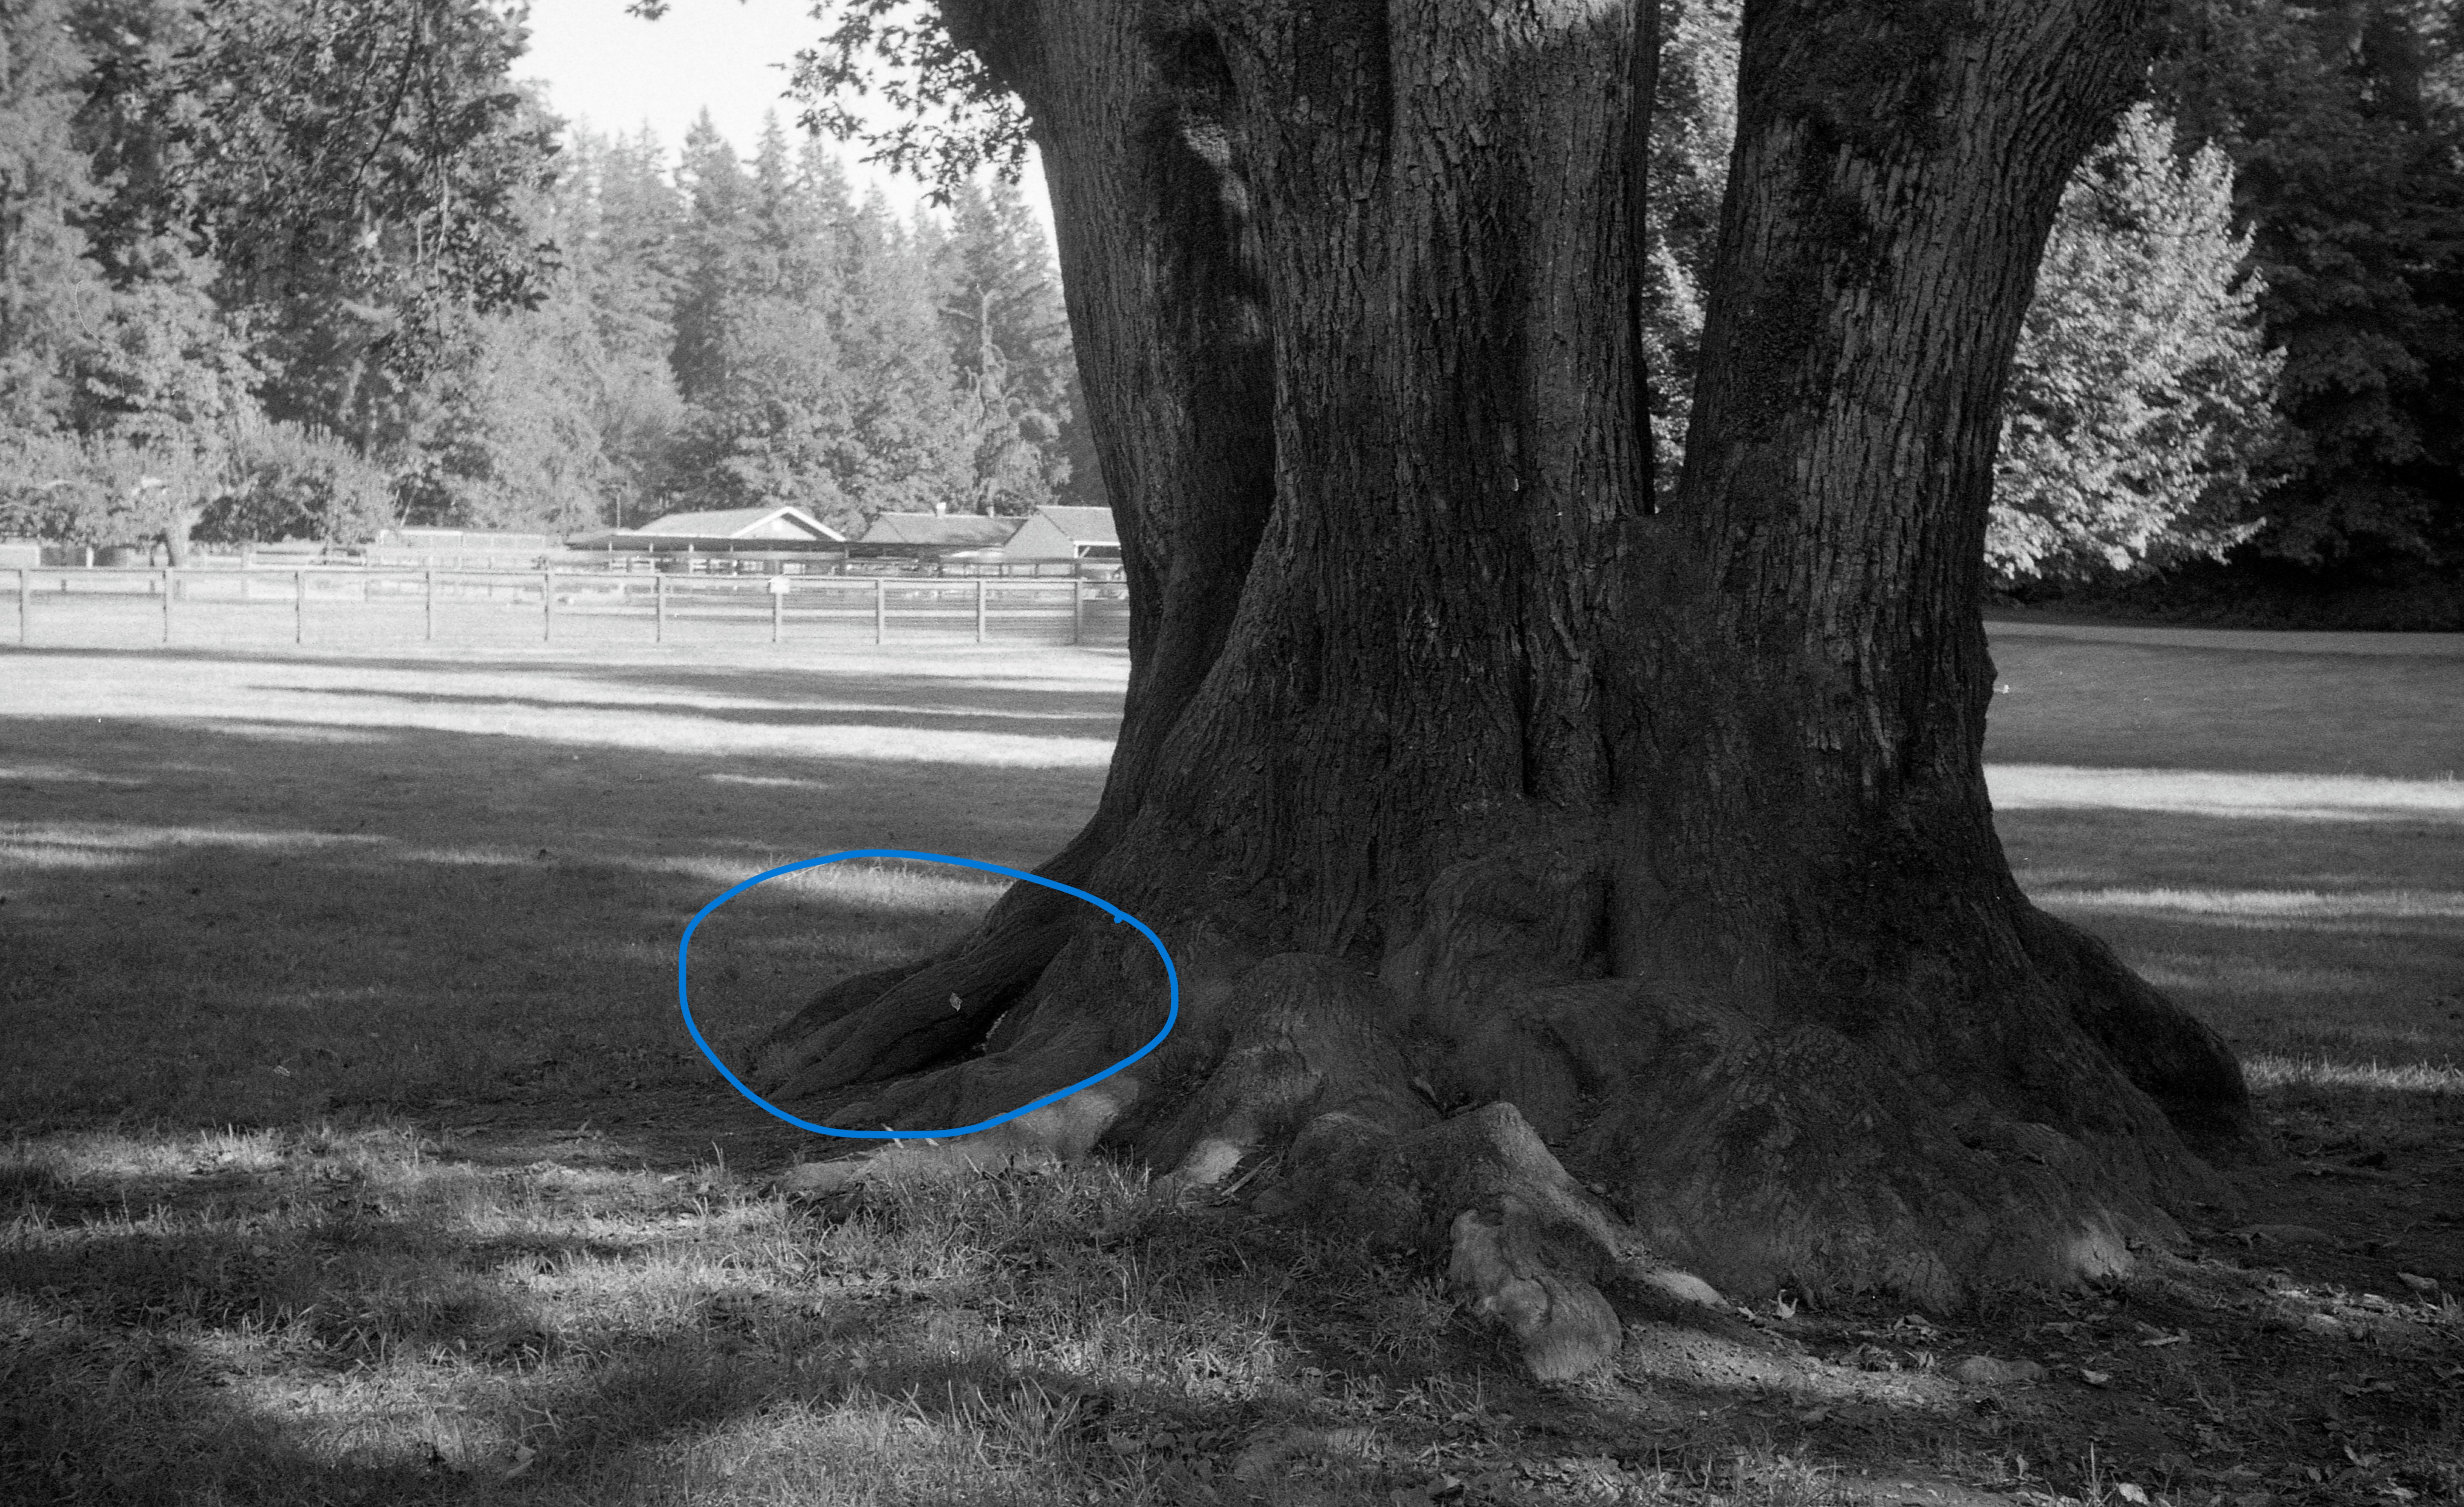
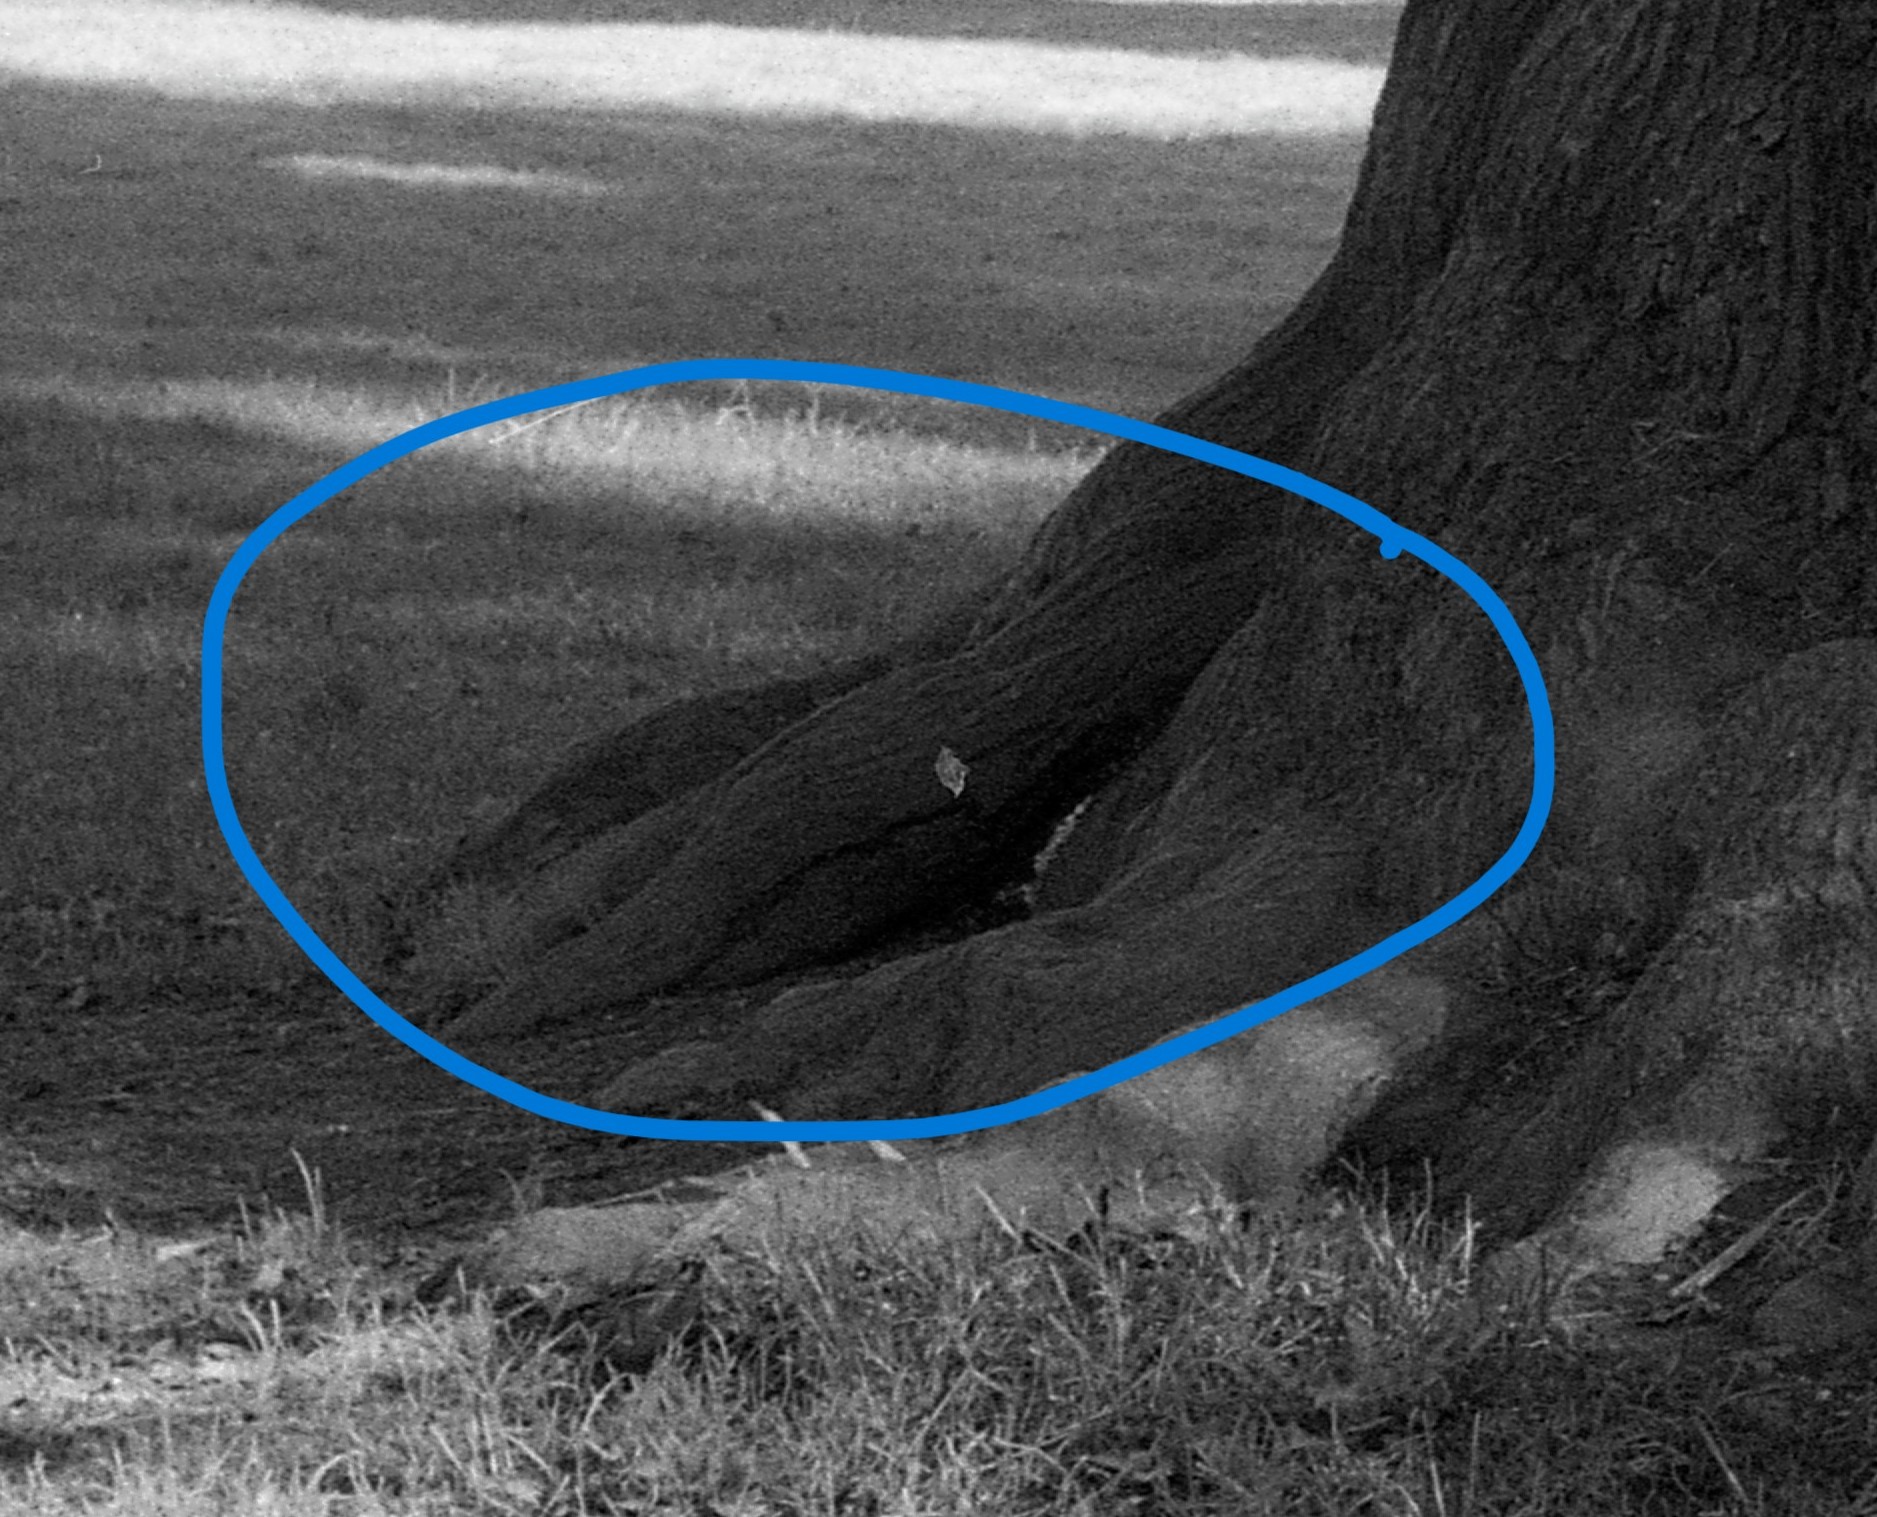
But it wasn’t just that small detail.
Look at the background exposure — the trees in the lab scan are completely overexposed, erasing shadow and texture that was clearly present in the negative.
Color Film Too?
Yes — it didn’t stop at black & white.
I checked a few color negatives as well, including some from Kodak Gold 200, a film known for its soft, slightly nostalgic color palette.
But what I saw in the lab scans felt… artificial.
Left = Lab Scan
Right = My Scan with Epson V800 and Negative Lab Pro

The difference in tone and feel is not subtle — it’s dramatic.
The lab’s version feels oversaturated and contrasty.
My scan retains the softness and character of Kodak Gold 200, which is exactly why I shot it in the first place.
Rethinking the Scan — And the Print
Now for the last example — and perhaps the most important one.
By this point, I had already begun to seriously reconsider two things:
- (a) How I scan my film
- (b) What I want my final prints to look like
And I think it’s worth unpacking this a little more.
There’s a belief — especially among some newer film photographers — that a negative scan should be shown “as is.” That anything beyond this is digital manipulation, or even cheating.
But this idea collapses quickly when you go back to the roots of analog photography.
In the darkroom days, there was no such thing as “as is.”
The straight print (a print made from a negative with no dodging, burning, contrast changes, or filtration adjustments) was often considered a rough draft — a test strip. The darkroom was not just a reproduction space; it was a creative workshop.
The final print was the result of choices — intentional, expressive choices — not a mechanical transfer of data.
Ansel Adams Didn’t Just Print — He Composed
Let’s not forget the master himself: Ansel Adams.
He didn’t just expose film and make a print.
He used the zone system to pre-visualize the final image — mapping out where his highlights and shadows would fall, then manipulating the negative during development and the print during enlargement to make that vision a reality.
A famous example is Moonrise, Hernandez, New Mexico.
The negative itself is well-exposed but somewhat flat.
The magic came later: selective dodging and burning, increasing contrast in the sky, pulling detail from the moon, and deepening the foreground to make the image sing.
That’s not manipulation. That’s photographic interpretation.
So What About Scanning?
Today, the scanner is our enlarger, and Lightroom is our contrast filter set.
And we are still allowed — in fact, obliged — to interpret.
When I scan my negatives now, I don’t ask, “What does the scanner give me?”
I ask:
- What did I see?
- What do I want others to feel?
- How would I have printed this on Ilford FB Matte or Agfa eggshell-tone fiber base?
That’s the mindset I bring to each frame.
And that’s when the work becomes mine again.
The Right Tools for the Right Scan
One thing I also changed in this process: I got rid of the flimsy OEM negative holder that came with the Epson V800.
Most stock film holders — including those shipped with premium scanners — are a compromise:
- Plastic frames that bend and warp
- Fussy anti-Newton-ring glass that adds unwanted reflections or softness
- Weak grips that allow negatives to shift mid-scan
- And let’s not even start on Epson’s uneven film height causing focus problems
After too many frustrating attempts, I finally found the one solution that works — consistently, cleanly, and without hassle:
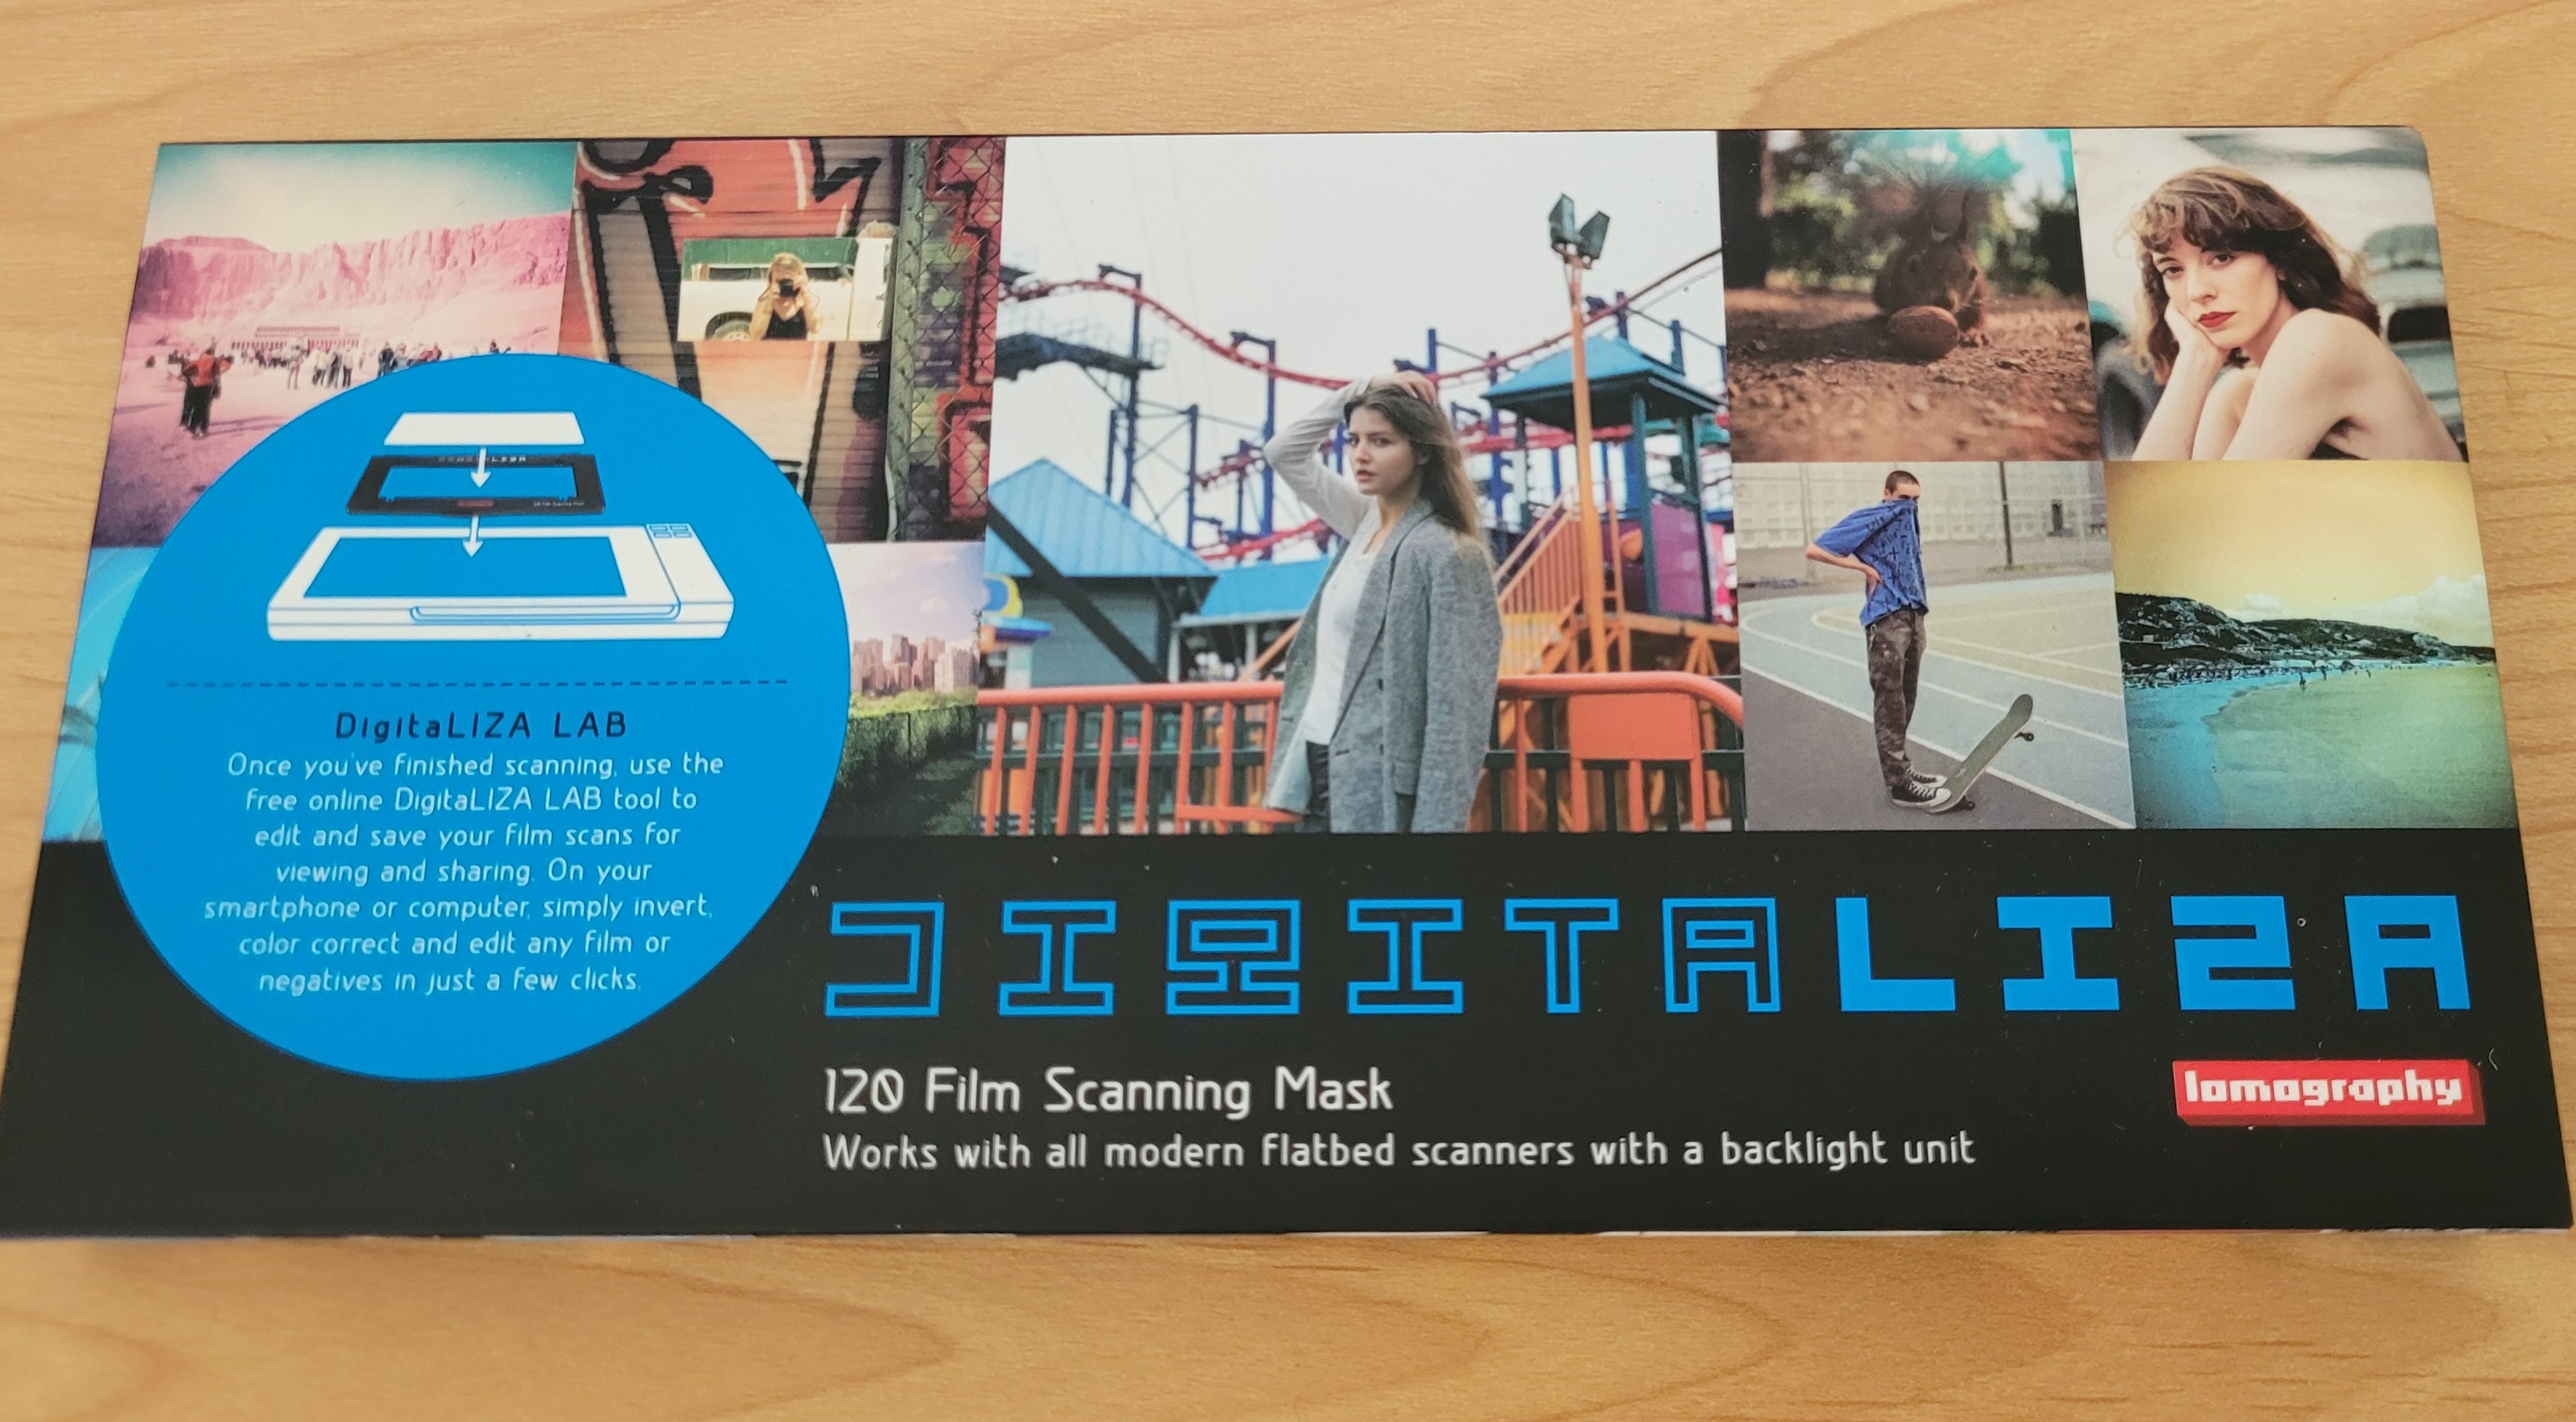
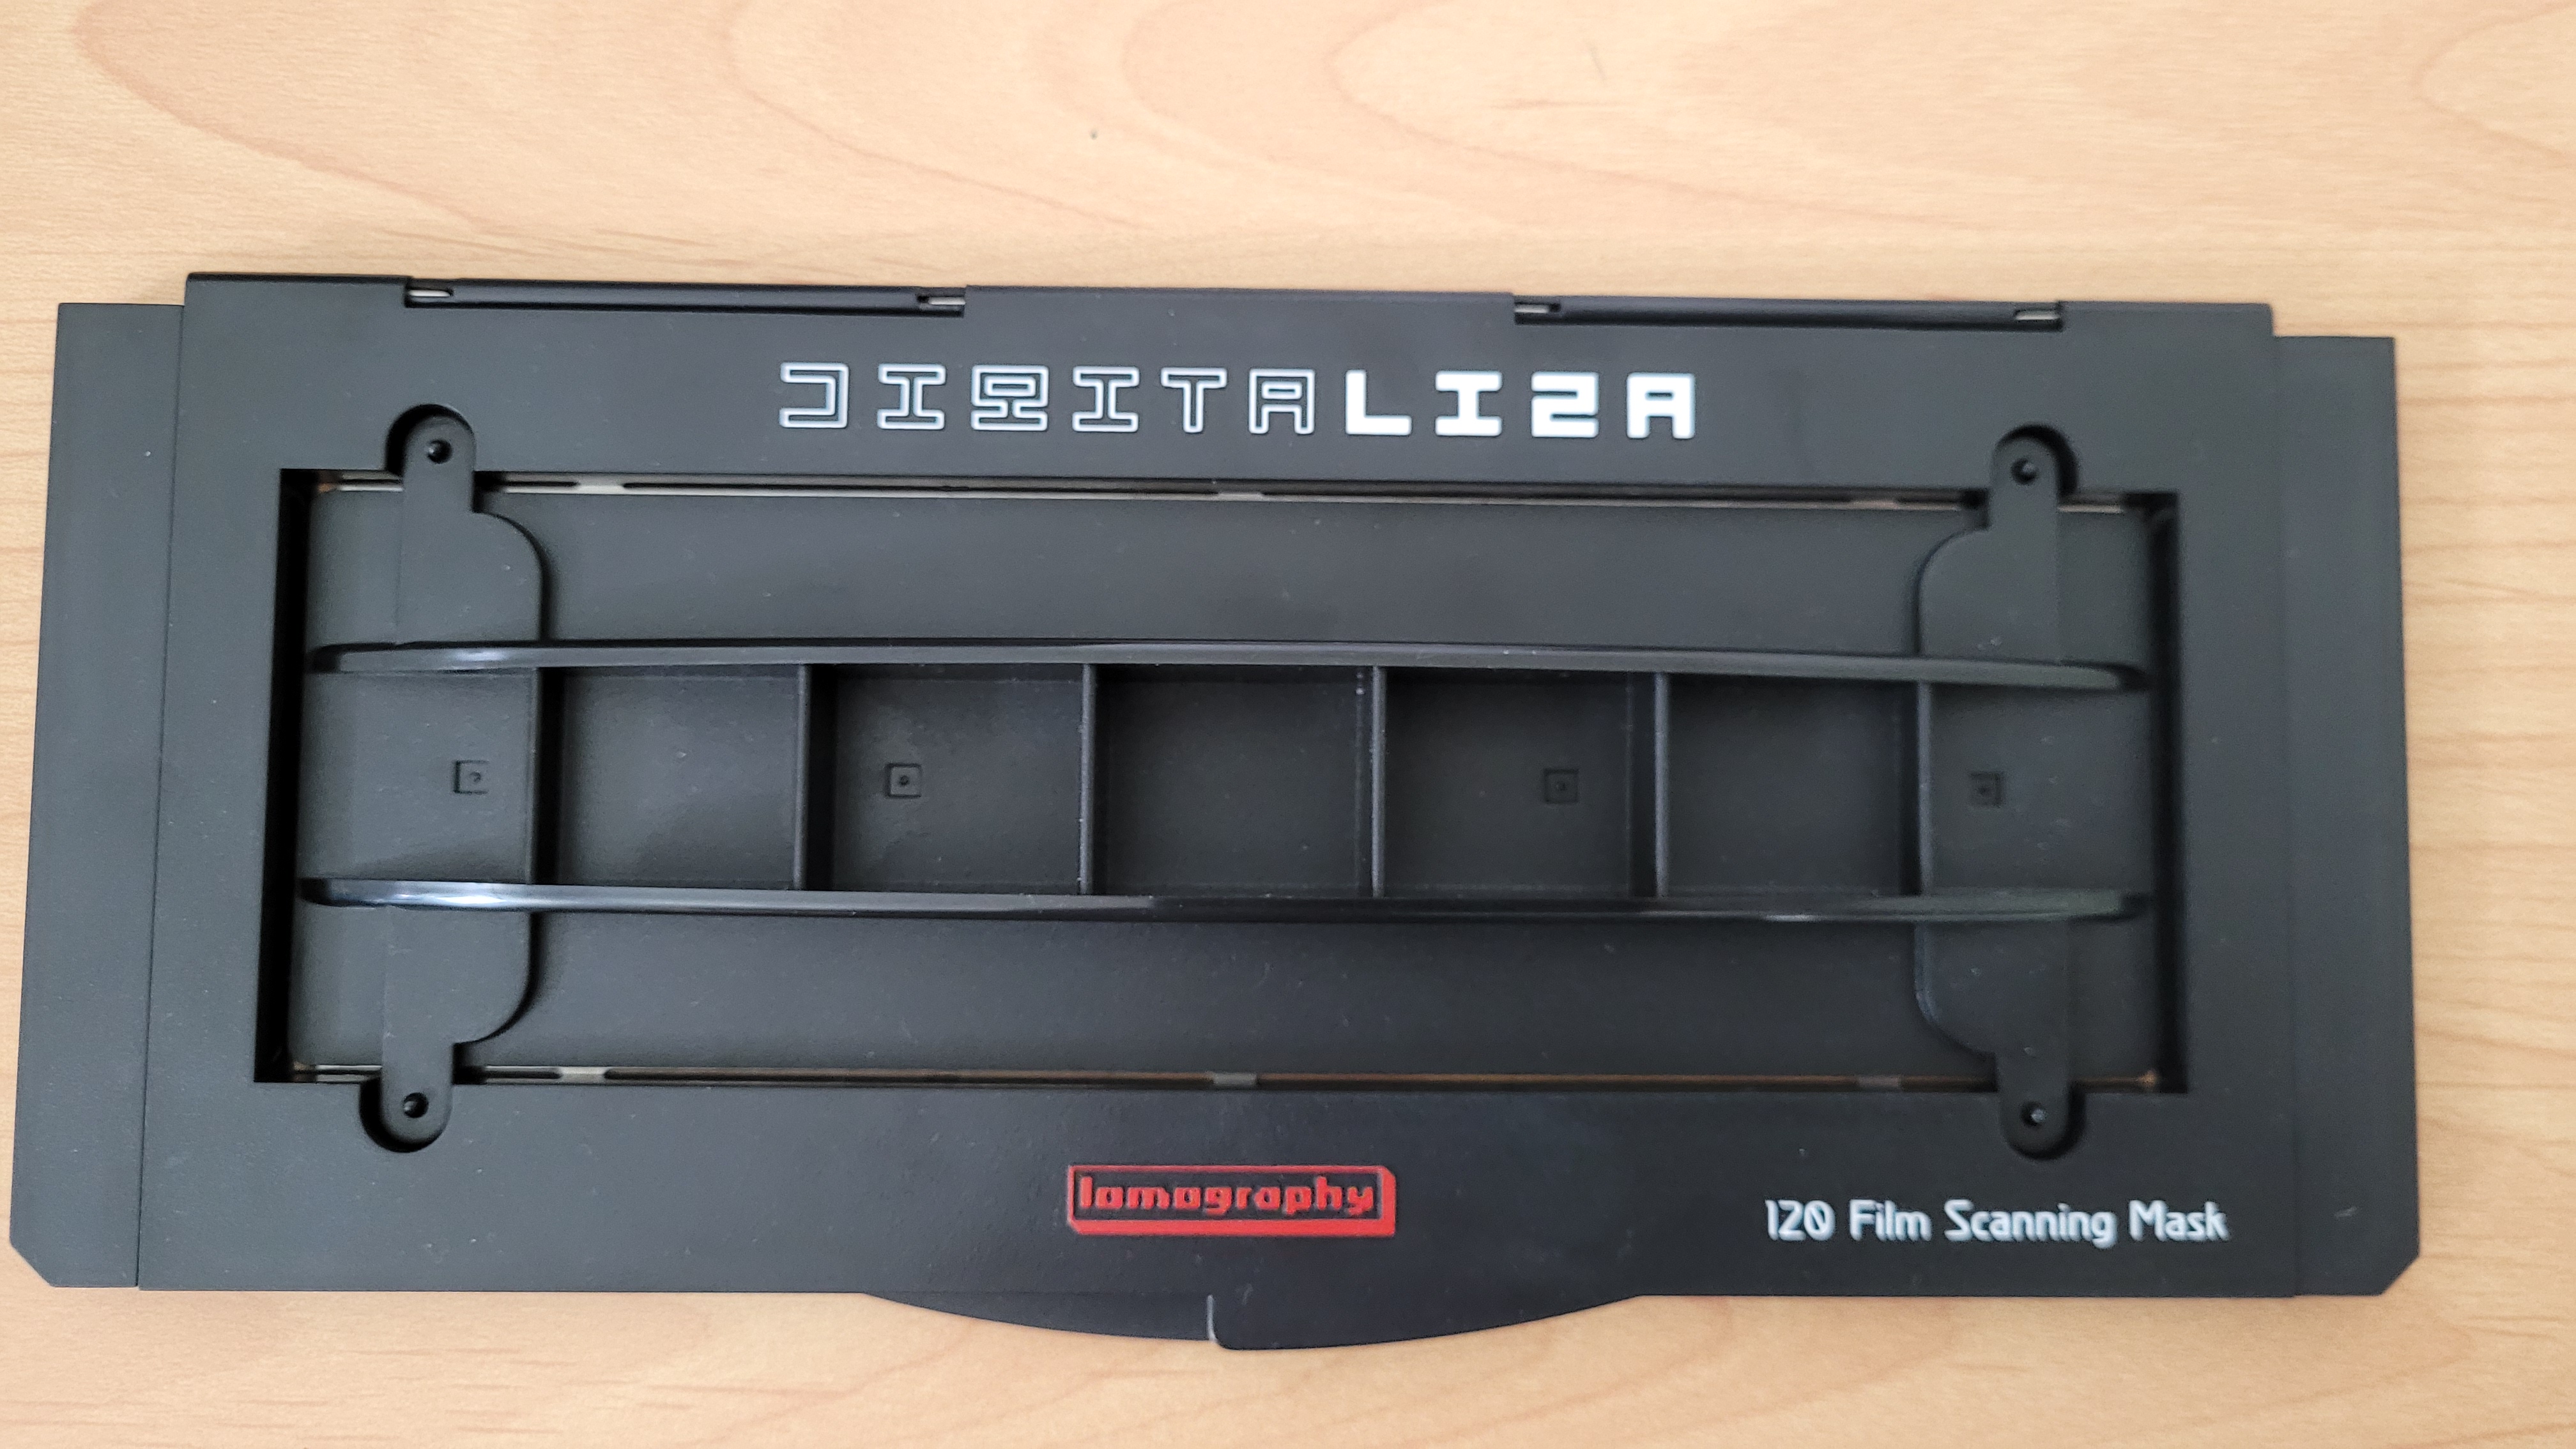
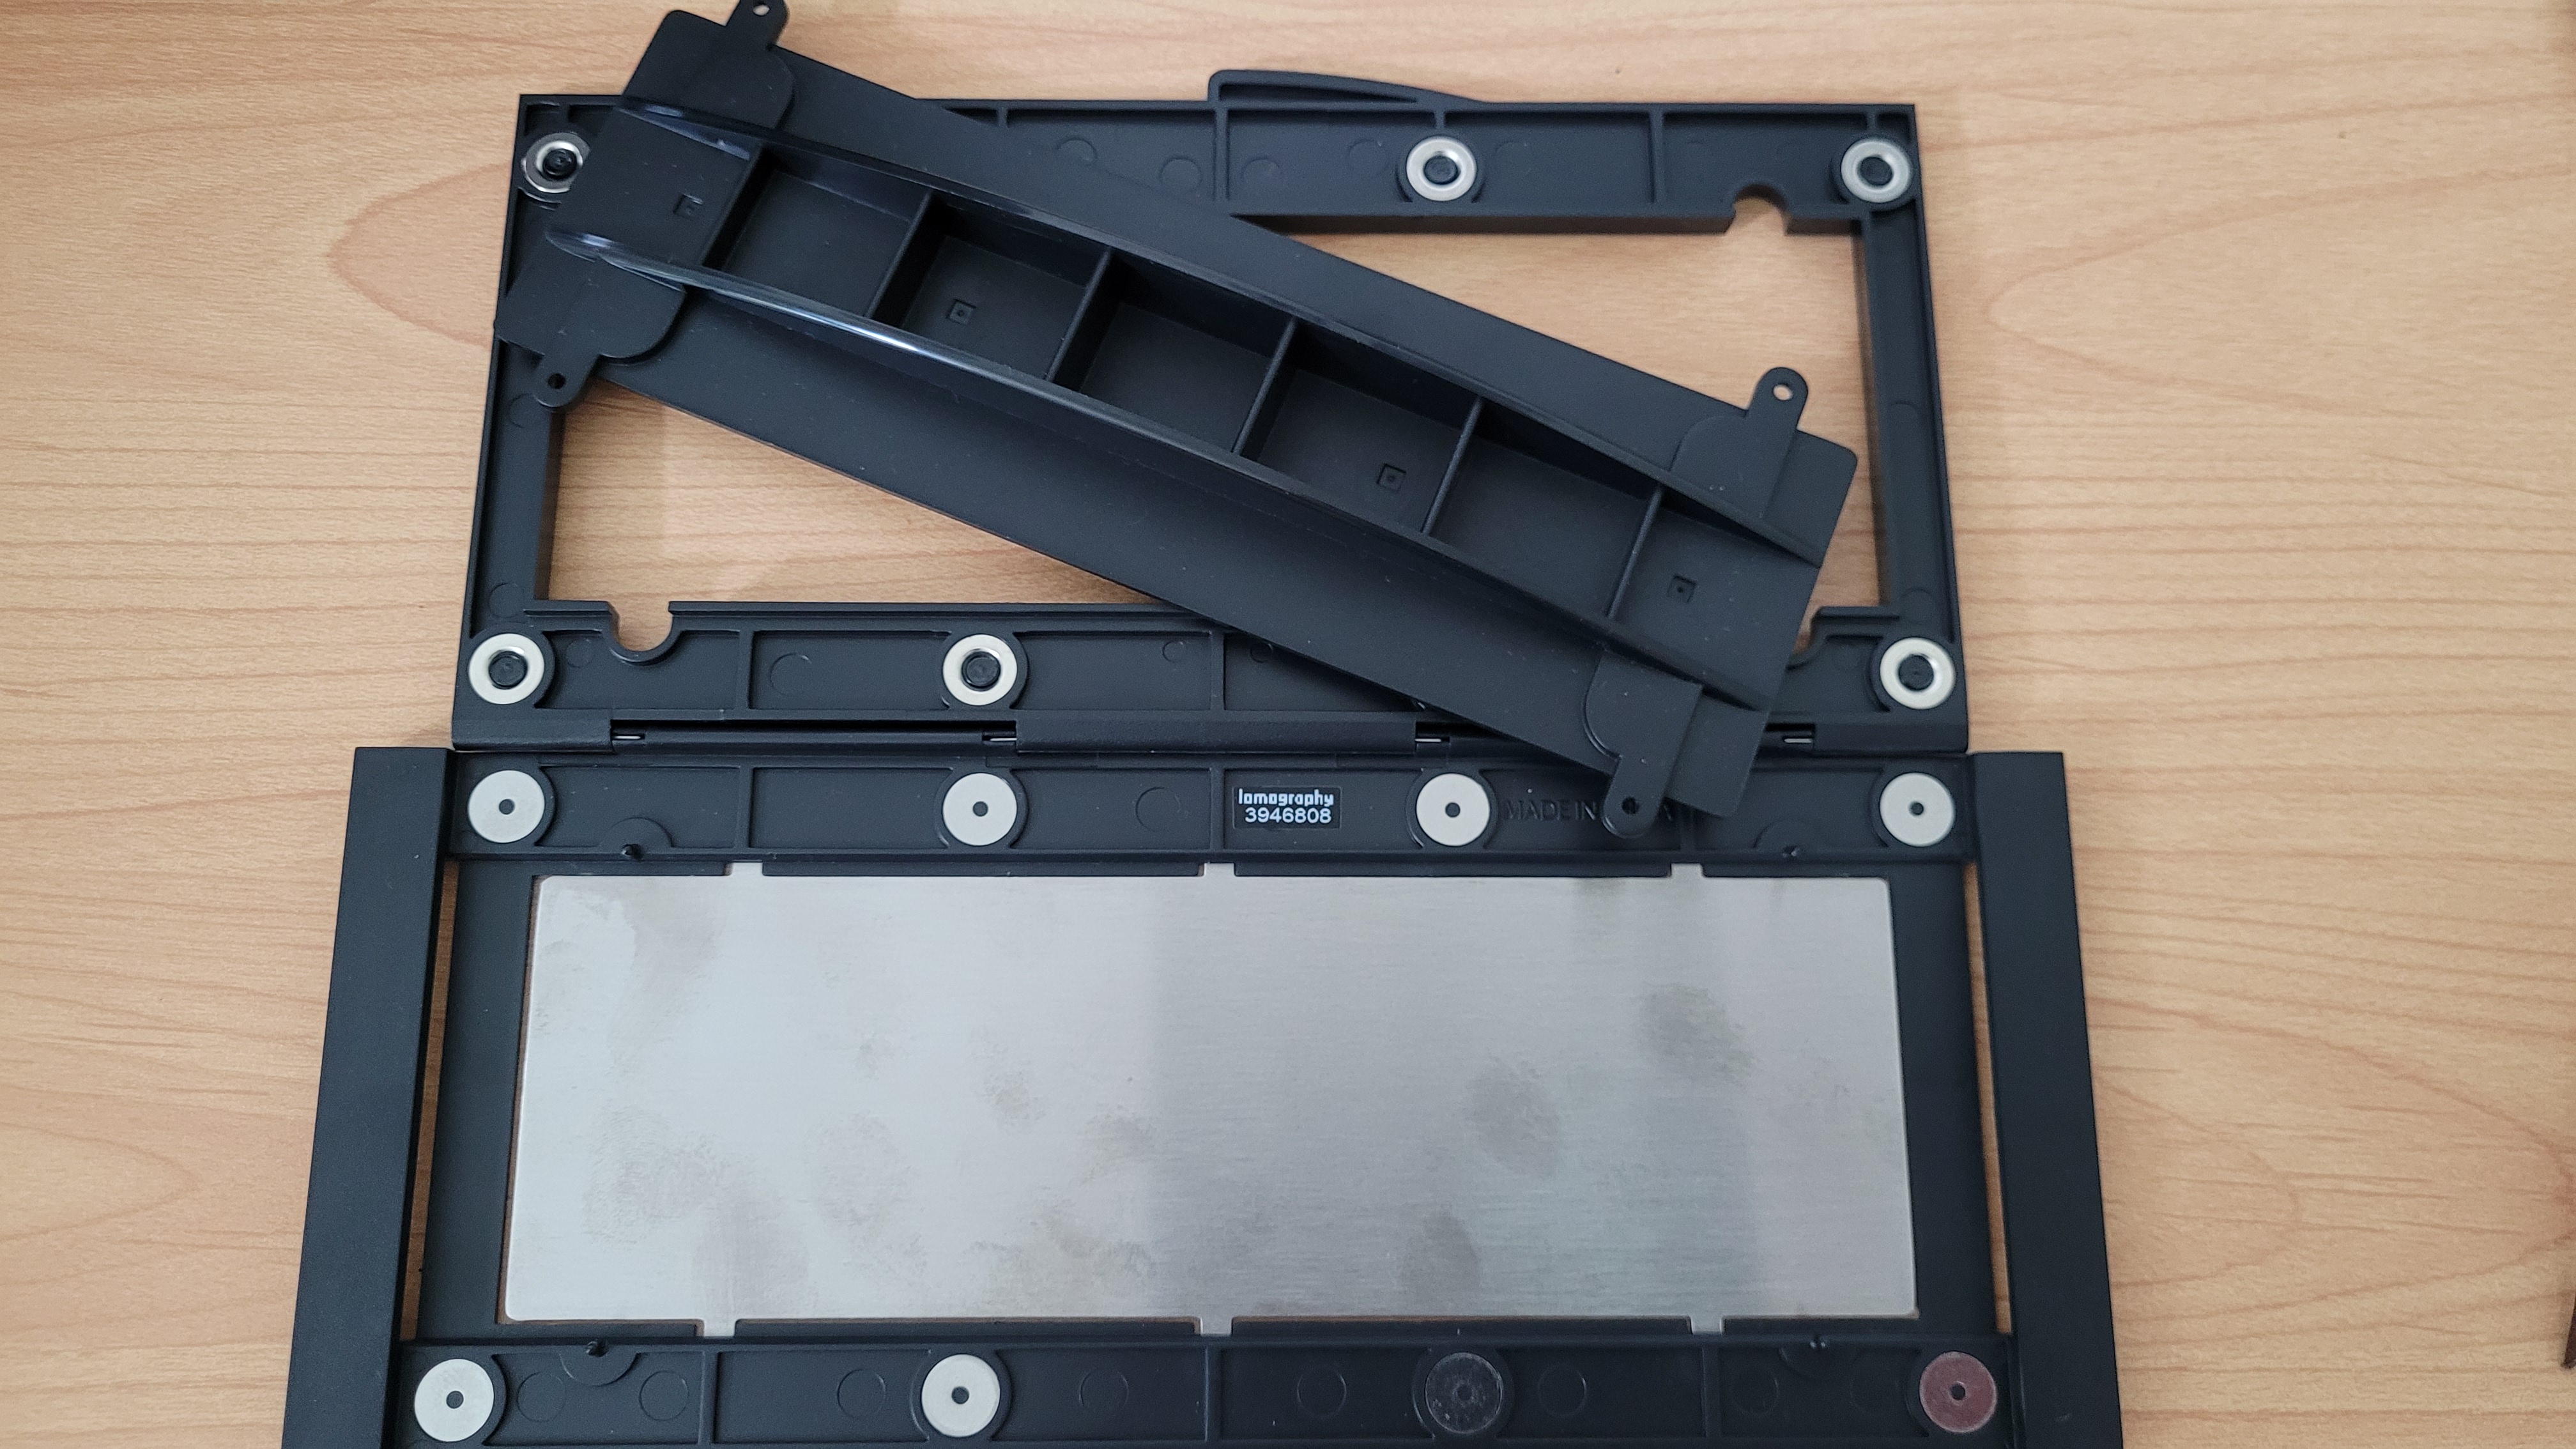
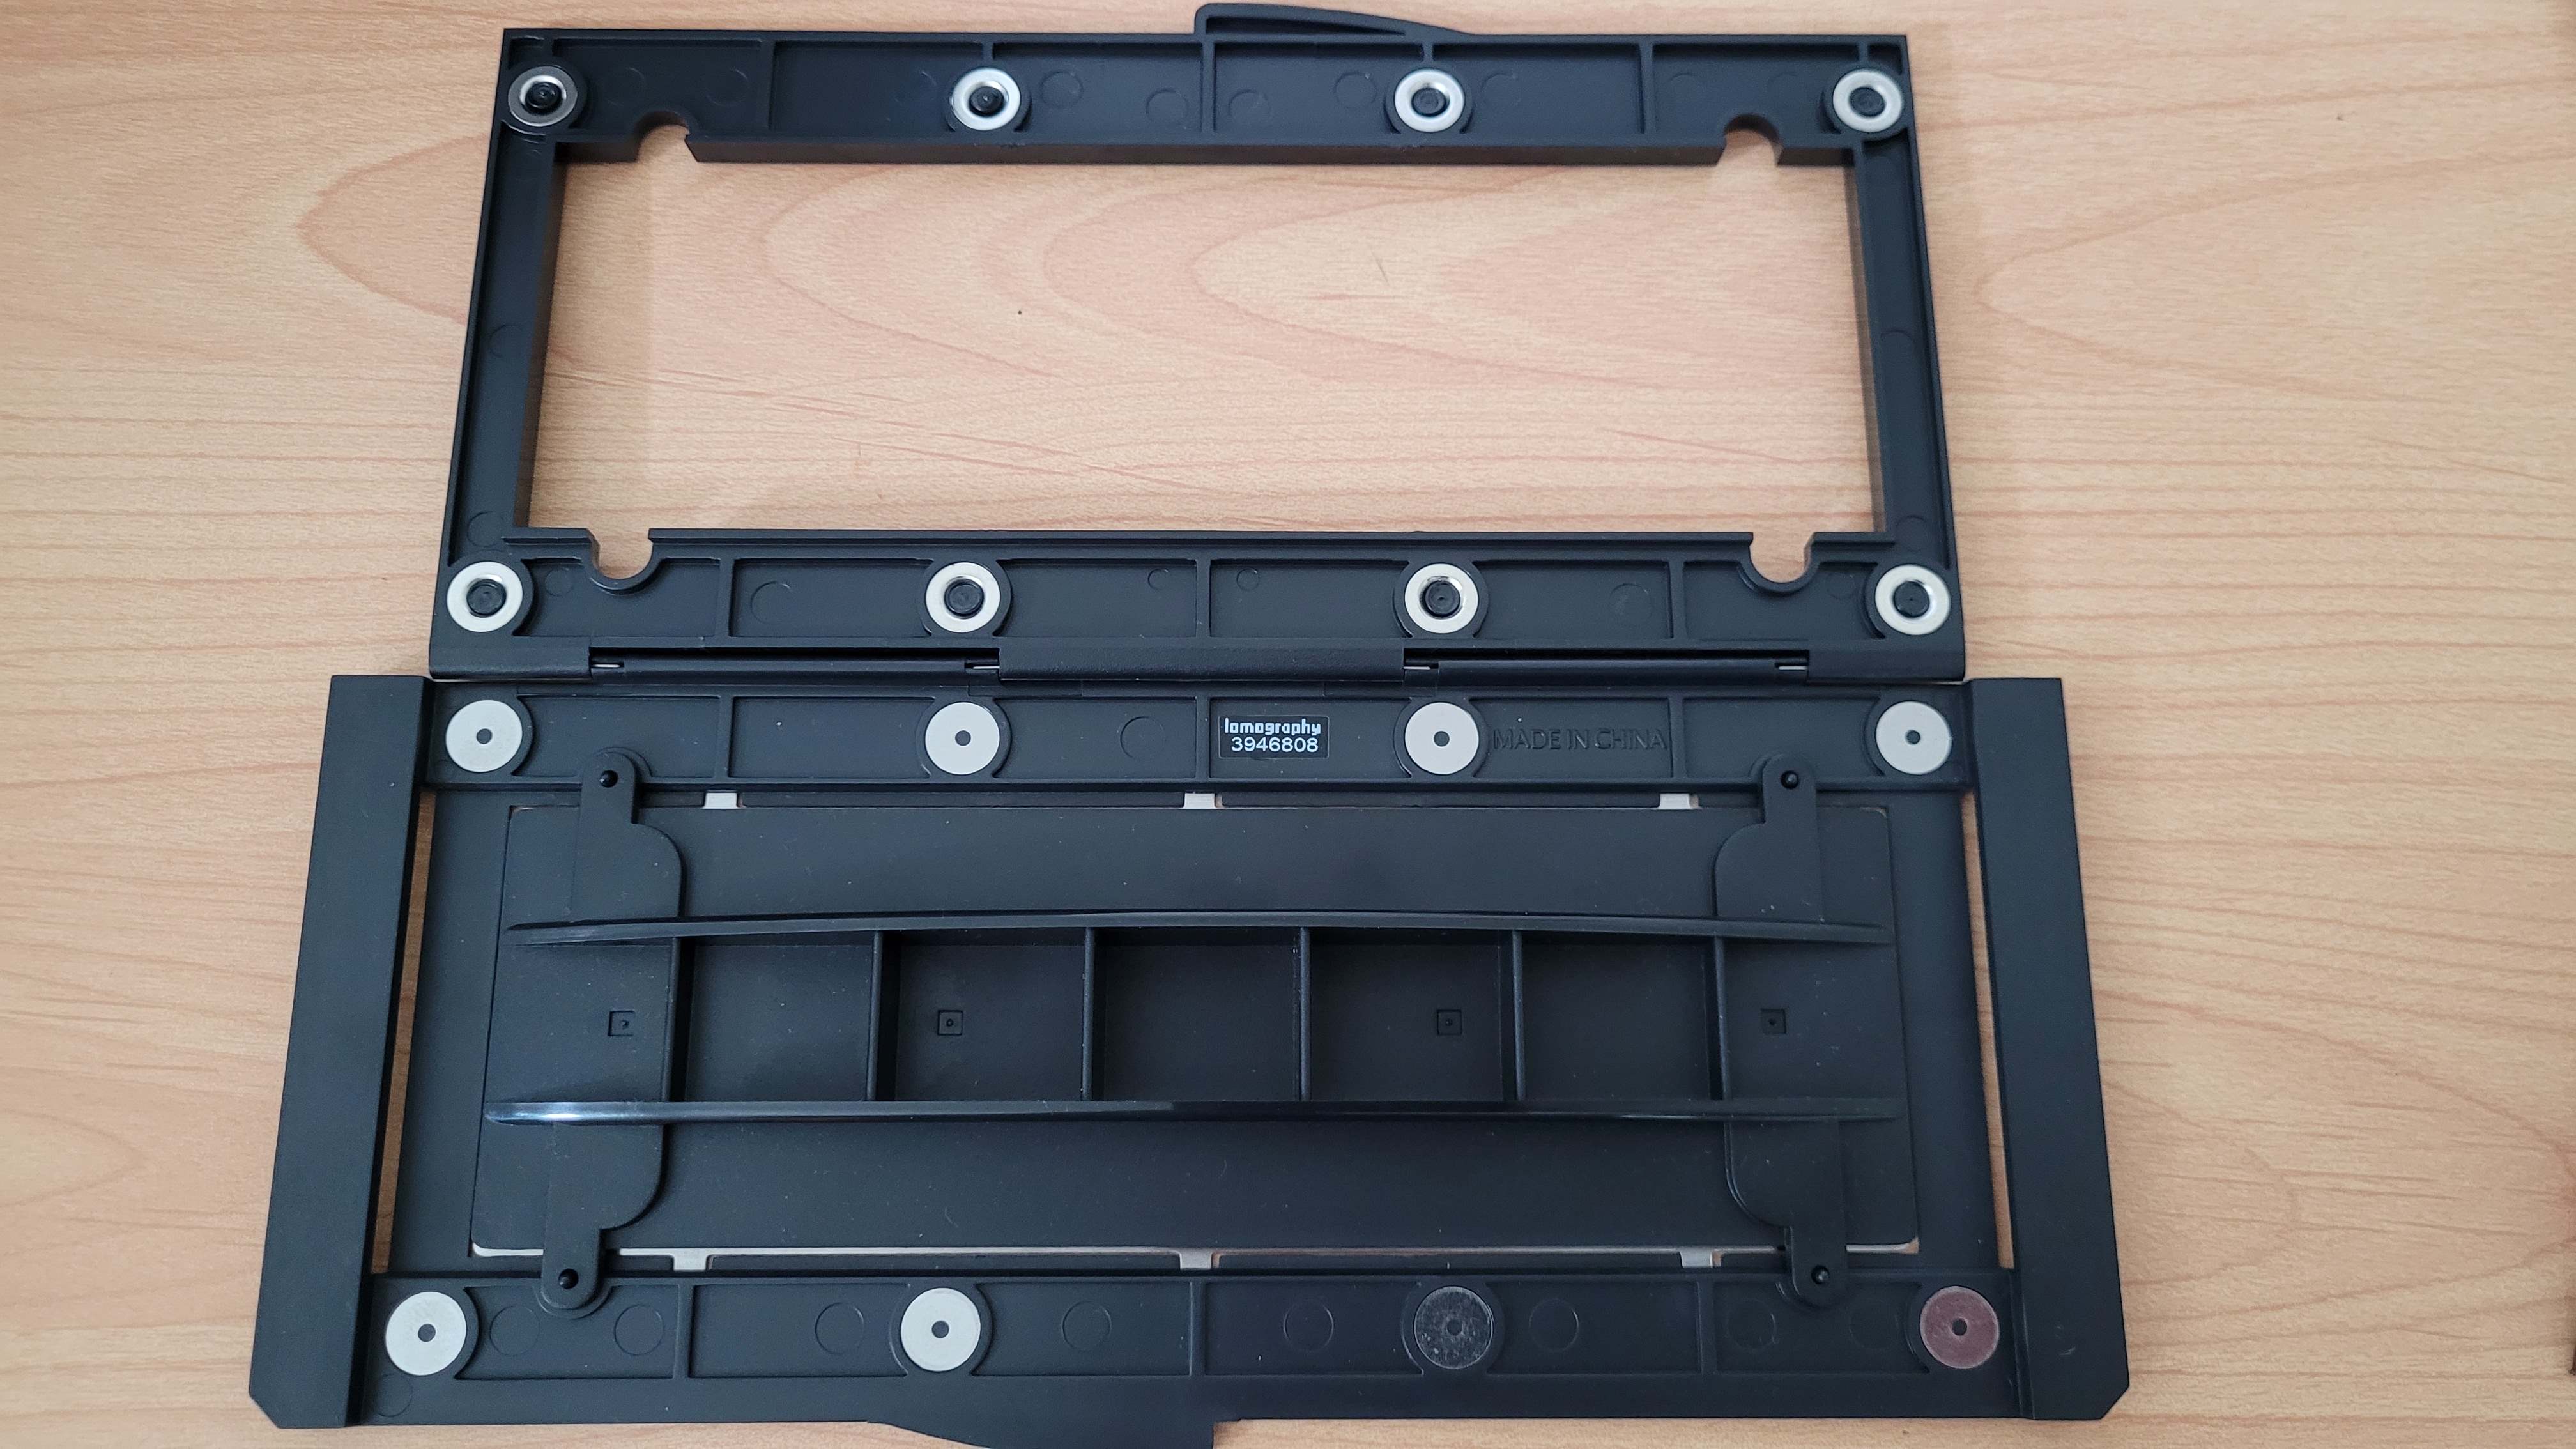
The Lomography DigitaLIZA 120 Scanning Mask
(also available in a 35mm version)
It holds the film flat.
No Newton rings.
No warping.
No fiddling.
No scanning edge bleed from misalignment.
Just a clean, secure grip that treats your negatives like they matter.
Unlike other holders, the DigitaLIZA system doesn’t clamp too tightly or rely on fragile plastic rails. Instead, it uses a simple, clever magnetic frame that locks the film perfectly in place — without scratching or pinching it.
It’s clearly designed by people who actually scan film.
And it shows.
Why Everything Else (Almost) Is Garbage
I’ve tried:
- Epson OEM holders
- “Pro” scanning trays from third-party accessory makers
Each had trade-offs — focus issues, film curl, unstable alignment, dust magnets, or worse.
The DigitaLIZA is the only holder I’ve used that gives me a clean, focused, reliably aligned scan every single time.
And since I scan all formats from 6×9 down to 6×6 and 35mm, being able to trust that my negative is flat and precisely held saves time — and preserves the integrity of my final image.
If you’re serious about making scanning part of your creative process — not just an afterthought — then this is the tool you want. It’s simple, effective, and built for film photographers, not tech engineers.
So, Now What?
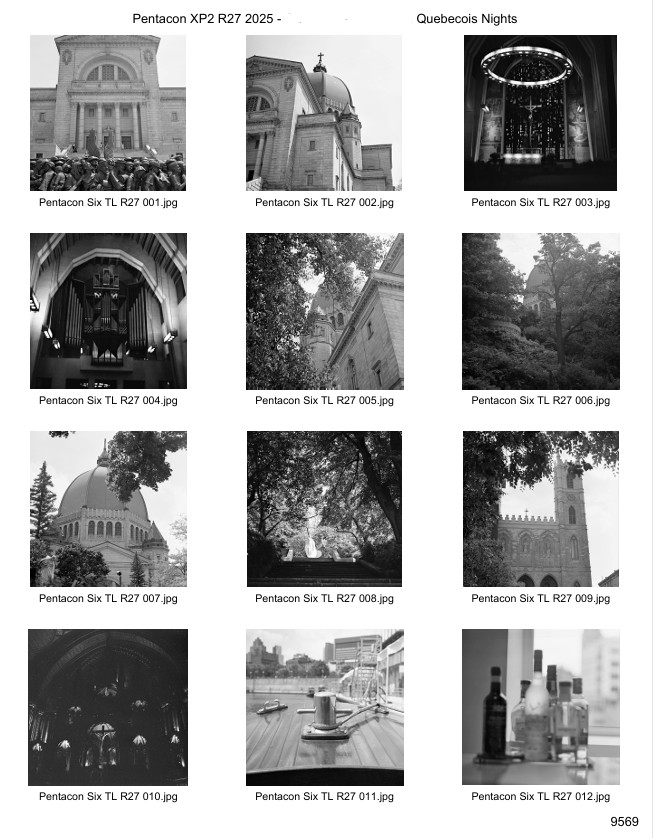
You’ve seen the intro photo — one of the first results from my new scanning workflow.
It was shot on Ilford XP2 Super 400, using my Pentacon Six TL, a camera that has become my go-to for 6×6 medium format.
And yes — it looks exactly how I wanted it to look.
Fair if you have a different opinion. But to me, this is how I saw it — and now how I want it to be remembered.
That’s what matters.
The following three frames were taken during a quiet walk in the Columbia River Gorge, a place where the textures of stone, sky, and light all interact in subtle ways. It’s exactly the kind of scene that suffers when over-sharpened, flattened, or misinterpreted by someone else’s scanning workflow.
These images were scanned using the Epson V800, held flat by the Lomography DigitaLIZA 120 mask, converted in Negative Lab Pro, and fine-tuned in Lightroom — following the exact method I’ve laid out in this blog.


What you’re seeing here isn’t magic — it’s simply the result of reclaiming control.
Letting the negative speak without being overpowered by someone else’s curve or contrast preset.
XP2 is a chromogenic black & white film — processed in C41 chemistry — and many labs treat it like color film, boosting midtones and softening edges. But when scanned intentionally, it reveals a wide tonal range and beautiful highlights that rival traditional B&W emulsions.
And let’s be honest with ourselves: Lightroom is just a digital darkroom — and those sliders?
They’re your burning-in tools, your graded filters, your developer timing knobs.
Dodging and burning weren’t cheating in the darkroom — they were the soul of expressive photography.
Today, we do the same thing electronically. It’s not about “fixing” the negative — it’s about drawing out its potential.
Electronic dodging and burning is just interpretation — with a different brush.
The negative contains possibilities.
It’s your job to choose which one becomes the final image.
🎞️ Analog B&W Scanning & Editing Workflow
For Epson V800 + Epson Scan 2 + Lightroom Classic + Negative Lab Pro
Summary: What This Workflow Is For
This is a professional-grade workflow to:
- Maintain full control over your scans
- Avoid the limitations of lab scans
- Mirror your physical archive structure
- Enable rich tonal edits (Ansel Adams style)
- Preserve and embed meaningful metadata
You scan “as is” at 6400 dpi, convert with Negative Lab Pro, and export with clean metadata and naming for archiving, printing, or web display.
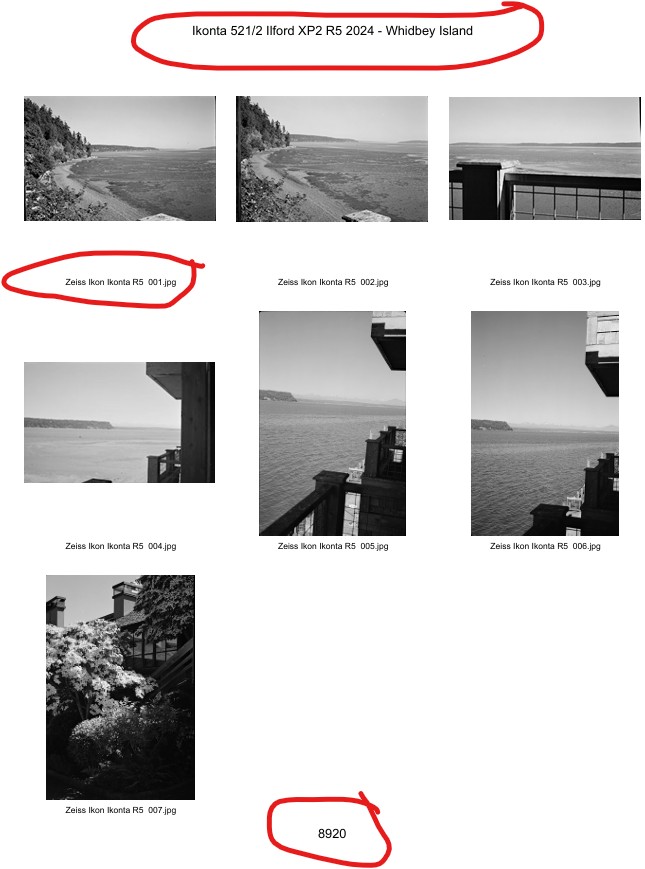
🗂️ Physical Archive: Contact Sheets & Binder System
For every roll I shoot, I create a contact sheet in US letter format that goes into my Beseler archival storage binder. Each sleeve contains:
- My continuous roll number (e.g., R18, R42, etc.)
- The date and year (I take the lab development date)
- The film stock used (e.g., Ilford HP5+, Kodak Gold 200)
- The camera used (e.g., Zeiss Ikon Ikonta, Pentacon Six TL)
- The lab number printed on the processed negatives (for cross-reference)
This physical archive mirrors my digital structure and ensures long-term access and context. The contact sheet provides a quick visual index for each roll — ideal for reviewing, selecting images for projects, or re-scanning with fresh eyes.
📁 Folder & Naming Structure
Matches your binder box system:
/Zeiss Ikon Ikonta/
  /7769/                               ← Roll number (from lab)
    Zeiss Ikon Ikonta R1 001.tif       ← Cropped TIFF (master)
    Zeiss Ikon Ikonta R1 001.jpg       ← Final JPEG (after NLP)
SCANNING: Epson Scan 2 + Epson V800
| Setting | Value |
|---|---|
| Mode | Professional |
| Document Type | Film (with Holder) |
| Film Type | Positive Film |
| Image Type | 16-bit Grayscale (or 48-bit Color) |
| Resolution | 6400 dpi |
| Sharpening/ICE | ❌ Off |
| Output | TIFF, uncompressed |
Tip: Always scan as positive — even for true B&W film — for best NLP results.
CROP & FILE NAMING
- Crop manually (in Lightroom not Scan 2)
- Naming:
Zeiss Ikon Ikonta R1 001.tif,R1 002, etc. - Matches physical roll/archive (e.g., 7769)
Lightroom Classic + Negative Lab Pro
Import
- No auto adjustments
- No resizing
- Add keywords if desired
🎛️ NLP Conversion Settings
- B&W Mode: ✅ On
- HDR Output: ❌ Off
- Tone Profile: Linear or B+W Soft
- S-Curve: Off
Don’t change color space here — do it at export.
Metadata: Presets & Syncing
✅ Create a Metadata Preset
Create Metadata presets for each camera with camera detailsone with these fields checked:
| Field | Value |
|---|---|
| Camera Make | Zeiss Ikon |
| Camera Model | Zeiss Ikon Ikonta 521/2 |
| Lens Make | Zeiss |
| Lens Model | Tessar 10.5mm f/4.5 |
| Film Format | Medium Format (6x9) |
Save as: Zeiss Ikon Ikonta
Build presets for every film type you use. Select all images after you are done with other edits and use your presets for metadata to fill.
Sync Metadata Across a Roll
- Select the image you added metadata to
- Shift-click to select all roll images
- Click “Sync Metadata”
- Choose which fields to sync (skip frame-specific fields like Caption if needed)
This ensures all images in a roll share consistent embedded EXIF metadata.
EXPORT: Final JPEGs
Use Lightroom’s Export to Hard Drive with:
| Setting | Recommended |
|---|---|
| File Format | JPEG |
| Quality | 100 |
| Color Space | Adobe RGB (1998) for print sRGB for web |
| Resolution | 6400 pixels per inch |
| Resize | ❌ Off |
| Metadata | ✅ Include All Metadata |
| Output Folder | Same roll folder (e.g., /7769/) or /EXPORT/ subfolder |
Then create a contact sheet with all necessary information
📂 Lightroom & Synology NAS Integration
As your archive grews, you might realize a notebook isn’t the right long-term home for raw scans, Lightroom catalogs, and backups.
The solution is to migrate the entire scanning, editing, and archiving workflow to a Synology NAS — keeping everything in one place, fully backed up, and accessible anywhere.
How have I done this?
1. Preparing the NAS
On my Synology home folder, I created a clear directory structure:
/home/Photography/RAW Files/
/home/Photography/Lightroom Backup/
- RAW Files → All master camera folders and roll subfolders live here.
- Lightroom Backup → Scheduled catalog backups from Lightroom are stored here.
This means the NAS is now the single source of truth for my master files and catalog.
2. Moving Camera Folders
I moved all existing camera folders from my notebook to /RAW Files/ on the NAS:
Pentacon Six TL/lab nr/roll number.tiff
Zeiss Ikon Ikonta/...
Holga/...
Zeiss Ikon Contina IIa/...
Inside each, negatives/photos are organized by my own continuous roll number, not the lab’s — ensuring consistent numbering across years.
3. Updating the Lightroom Catalog
After moving the files, I opened Lightroom, right-clicked each camera folder, and selected Update Folder Location.
I pointed each to the corresponding NAS path:
\\NewPortCastle\home\Photography\RAW Files\[Camera Name]\
This preserved all edits and metadata without re-importing or breaking links.
4. Local RAW Staging
Scans from the Epson V800 first land in a local “staging” area on the notebook:
/Pictures/Lightroom/Local RAW Files/camera/negative number
This is where initial cropping, metadata application, and Negative Lab Pro conversions happen before the files move to the NAS.
5. Moving to the NAS After Processing
Once the roll is cropped, processed, and named to match my binder archive (roll number, date/year, film type, camera, lab number), I move the folder from Local RAW Files into the correct /RAW Files/ location inside Lightroom.
Doing it within Lightroom keeps the catalog updated automatically.
6. Virtual Copy Color Coding
To manage editing progress:
- Red label → First working edit (draft stage).
- Green label → Final export-ready version.
This makes it easy to filter, review, and batch-export only the finished images.
7. Export & Project Organization
Green-labeled virtual copies are exported as JPEGs into the same roll folder for reference.
Final selects are then copied into project folders named with year-month plus the project title:
/2025-01-From My Front Door/
/2025-03-Lost Places Monochrome/
/2025-04-Churches & Cemeteries/
These live on the NAS and are also synced to OneDrive using Synology Cloud Sync.
8. Synology Photos Integration
Project folders are automatically indexed in Synology Photos, giving me:
- Remote viewing on phone or tablet.
- Easy sharing without relying on external cloud platforms.
- A second backup layer independent of the notebook.
✅ Why This Works
- Centralized archive → NAS stores RAW masters, Lightroom catalog, and final images.
- Catalog stability → Lightroom always points to the NAS; no broken links.
- Local efficiency → Notebook handles only the staging work.
- Two-layer backup → Synology Photos + OneDrive keeps everything safe and accessible.
This setup streamlines my workflow from scan to final project while keeping my archive future-proof, portable, and fully under my control.
✅ Final Checklist
- Scan film as positive TIFF at 6400 DPI
- Import into Lightroom (no auto adjustments)
- Crop and name to match binder archive
- NLP Conversion: B&W mode, HDR Output OFF
- Apply metadata preset to first image
- Sync metadata across entire roll
- Produce contact sheet for archive binder
- Export JPEG at 6400 PPI with correct color profile
- Place best images into final project folders on NAS
- Synology Photos sync confirms availability on all devices
- Backup catalog and RAW files regularly
Thanks for reading!
If you find value in my content, consider supporting me with a virtual coffee ☕️ or a beer 🍺.
Your contributions help keep this blog thriving.
© 2025 Henry