Mastering Close-Up Photography with Zeiss Proxar Lenses for the Zeiss Ikon Contina IIa
In this blog, I try to relearn and remember how to use the Zeiss Proxar lenses with the Zeiss Ikon Contina IIa, how to stack them, and how to calculate the resulting subject distances based on aperture settings. We’ll also cover important technical details that are often overlooked, including the role of diopters, stacking combinations, and the effect of different apertures.
The Zeiss Ikon Contina IIa is a classic rangefinder camera and one of Zeiss Ikon’s consumer models. Over time, there have been various variations of this camera, but they share common features like the 28.5 mm snap-on for Proxar and Distar lenses, and a 27 mm screw-in lens mount for Zeiss precision filters.
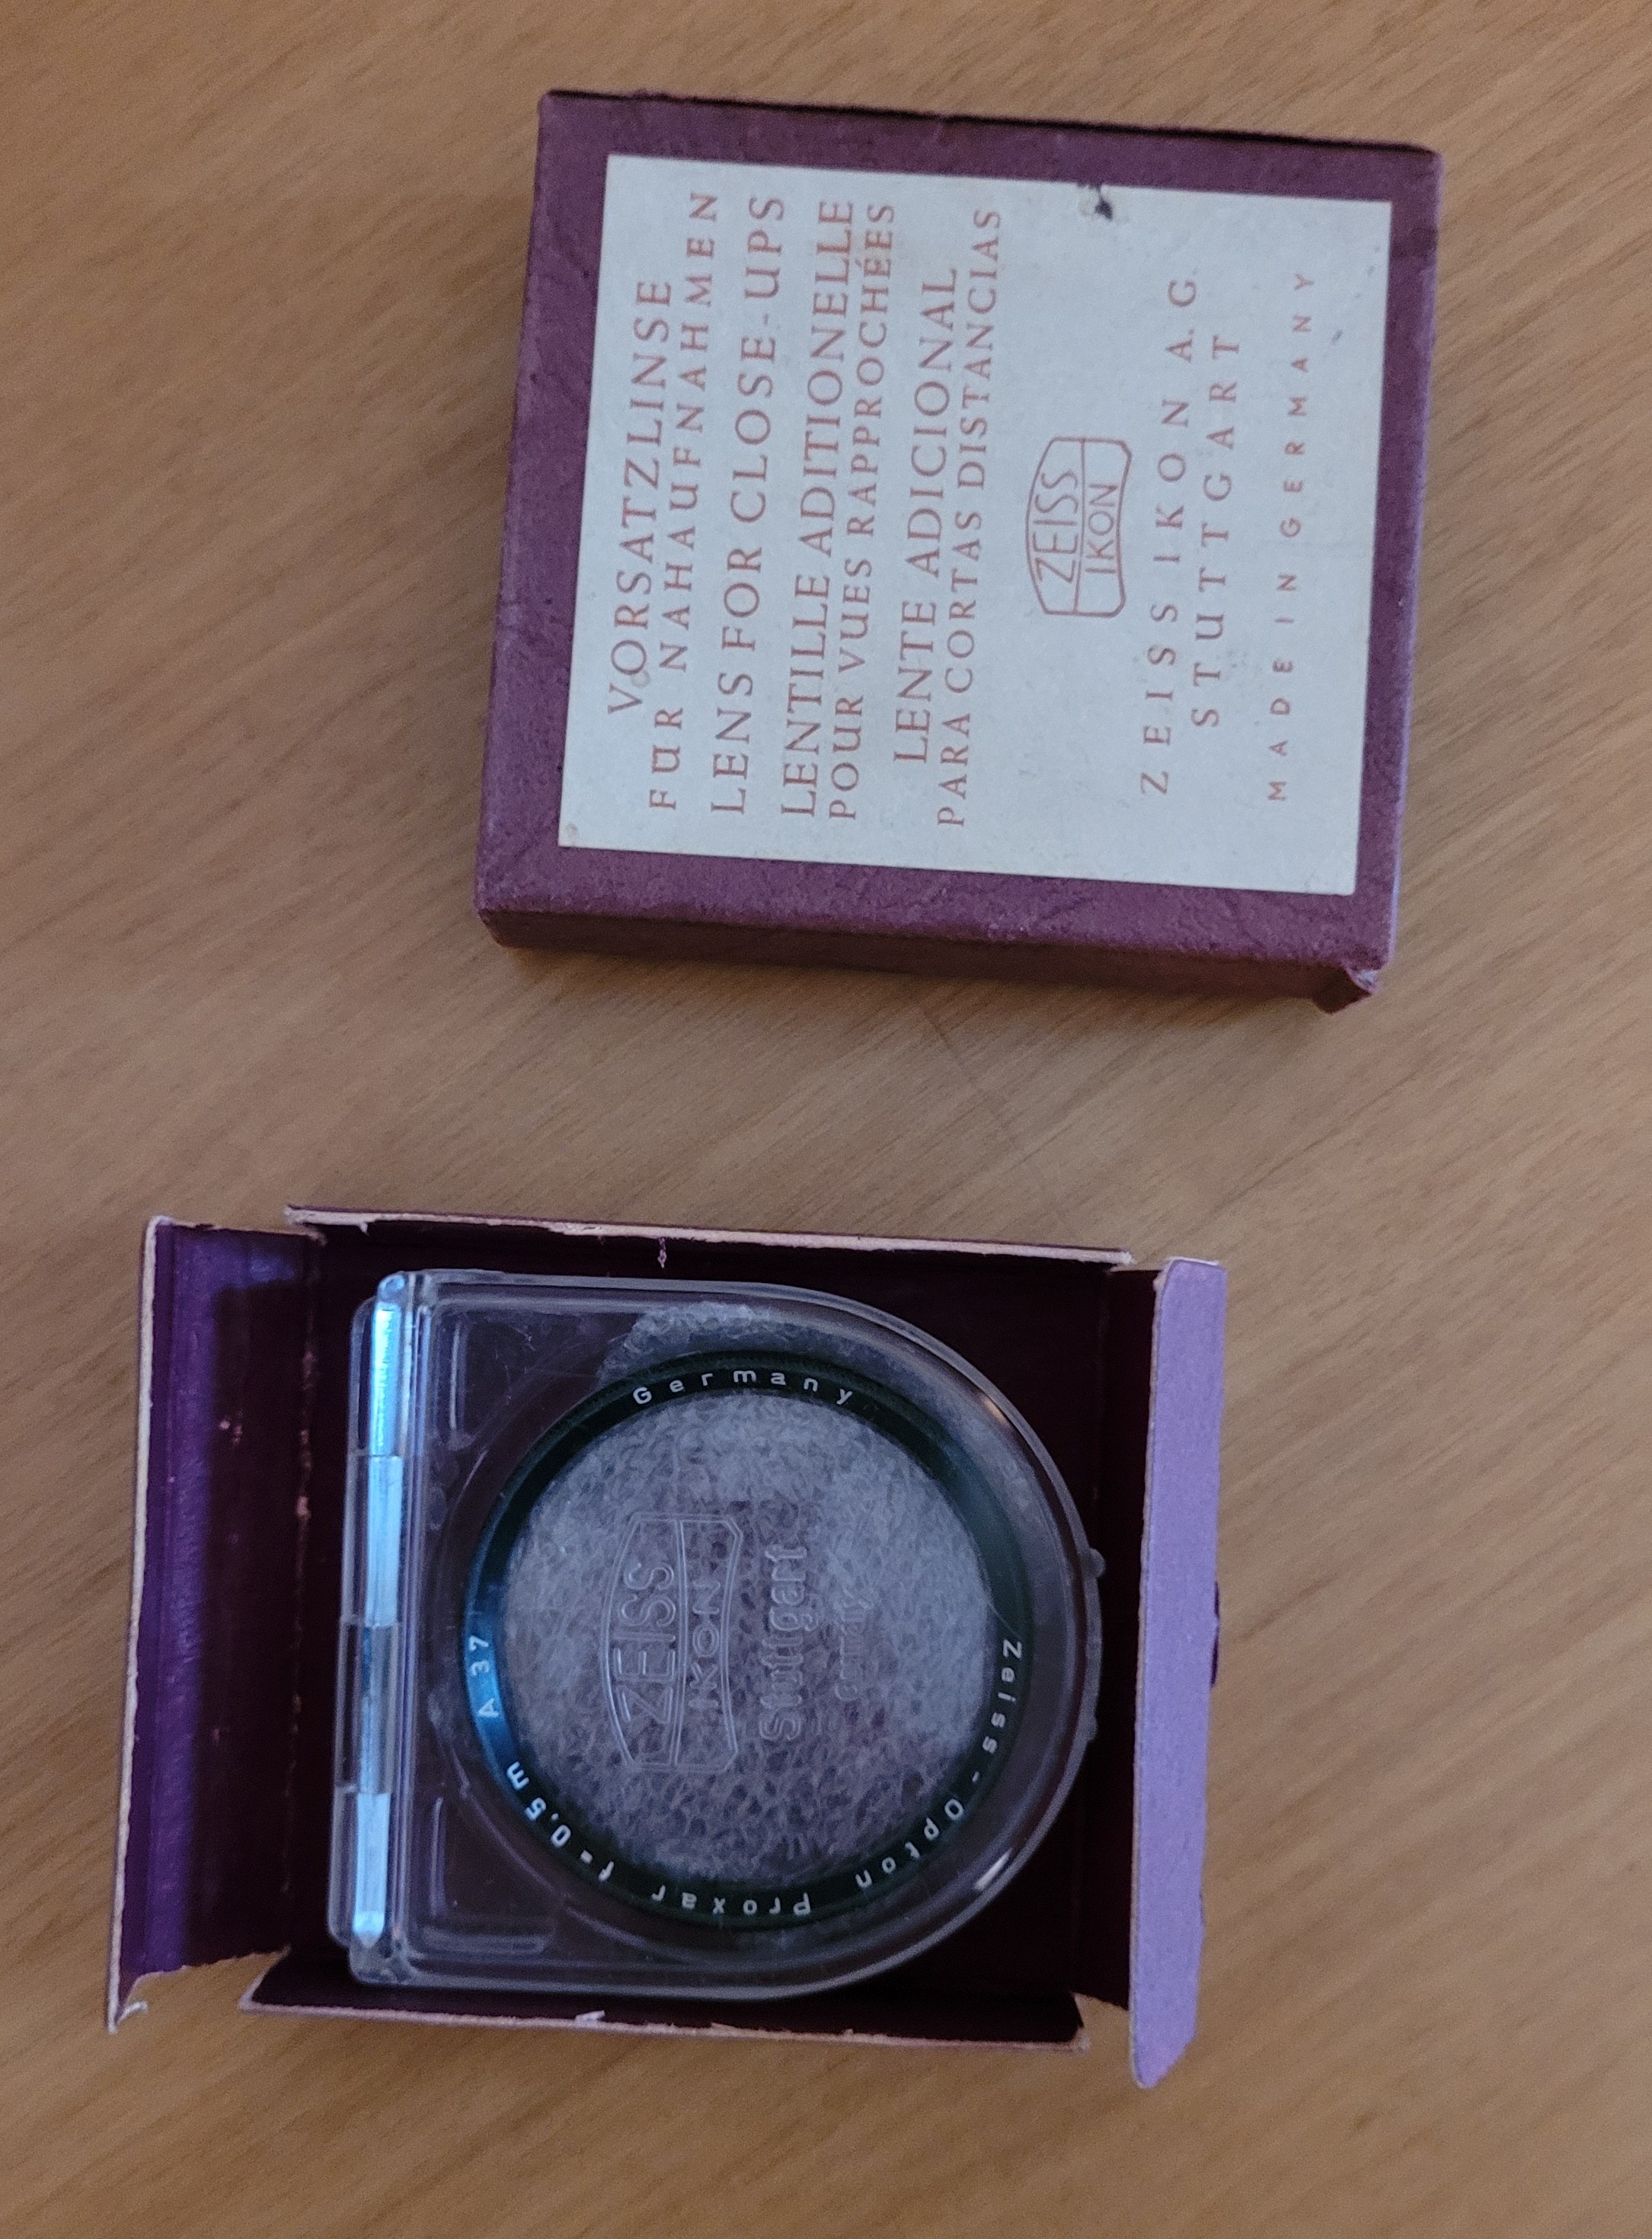
For the Zeiss Ikon Ikonta 521/2, similar lenses are available under the name Opton Proxar, featuring a 37mm snap-on mount.

The elegant, velvet-lined cases reflect Zeiss’s attention to detail. But let’s return to the Contina IIa.
The Contina IIa has a minimum focusing distance of 0.9 meters, which is great for general photography. However, when you want to get closer for macro photography, the Zeiss Proxar lenses offer a perfect solution. These auxiliary close-up lenses allow you to reduce the minimum focusing distance and capture stunning close-up details.
While Zeiss Proxar lenses enable close-up photography, the Zeiss Distar lenses represent a different optical tool that should not be confused with Proxar lenses.
What Are Zeiss Proxar Lenses?
There are two types of Zeiss lenses we’ll focus on here:
- Proxar
- Distar
I will primarily discuss the Proxar lenses since I don’t own or have experience with the Distar lenses.
Zeiss Distar Lenses: A Simple Guide
Zeiss Distar lenses are accessories that modify the focal length of your camera lens. The focal length affects how much of a scene you capture and how close or far away objects appear.
How Distar Lenses Work:
- Increase Focal Length: Attaching a Distar lens in front of your camera lens increases the focal length, enabling you to focus on more distant subjects.
- Need More Camera Extension: To focus on distant objects, your camera’s bellows (extension) needs to be longer. For instance, attaching the Distar 3 to a 13.5cm lens increases its focal length to 22.5cm, requiring a 23cm extension to focus on infinity.
In Short:
- Distar lenses extend the focal length of your lens, making it easier to focus on distant subjects. They’re great for photographers looking to increase their lens’s range.
Zeiss Proxar Lenses
Zeiss Proxar lenses are supplementary lenses that attach to the front of your camera lens, allowing you to focus on subjects much closer than the native minimum focusing distance of your lens. These lenses come in different strengths, called diopters, which determine the degree of magnification.
The available Proxar lenses include:
- 0.2m: 5 diopters
- 0.3m: 3.33 diopters
- 0.5m: 2 diopters
- 1.0m: 1 diopter
The diopter value indicates how close you can focus. For example, a 5 diopter Proxar lens allows you to focus as close as 0.2 meters.
Calculating Subject Distance with Proxar Lenses
To calculate the subject distance when using a Proxar lens, you can use the following formula:
\[\text{subject_m} = \frac{\text{scale_m}}{(\text{diopters} \times \text{scale_m}) + 1}\]Where:
- subject_m is the subject distance in meters
- scale_m is the distance set on the main lens of your camera (in meters)
- diopters is the strength of the Proxar lens
Example Calculation
Let’s say you are using a 1 diopter Proxar lens with your camera set to focus at 0.9m:
\[\text{subject_distance} = \frac{0.9}{(1 \times 0.9) + 1} = \frac{0.9}{1.9} \approx 0.474m\]So, with a 1 diopter lens, the subject distance is approximately 0.474 meters.
Subject Distance with Various Proxar Lenses
Here’s a breakdown of subject distances when using different Proxar lenses with the Zeiss Ikon Contina IIa, set to its minimum focus distance of 0.9m:
| Proxar Lens | Diopter Value | Calculation (Main Lens at 0.9m) | Resulting Subject Distance |
|---|---|---|---|
| 0.2m | 5 Diopters | \(\frac{0.9}{(5 \times 0.9) + 1}\) | 16.67 cm |
| 0.3m | 3.33 Diopters | \(\frac{0.9}{(3.33 \times 0.9) + 1}\) | 24.24 cm |
| 0.5m | 2 Diopters | \(\frac{0.9}{(2 \times 0.9) + 1}\) | 28.57 cm |
| 1.0m | 1 Diopter | \(\frac{0.9}{(1 \times 0.9) + 1}\) | 47.44 cm |
With the 0.2m Proxar lens, you can focus as close as 16.67 cm, which is ideal for macro shots.
The Scaler: A Handy Focusing Aid
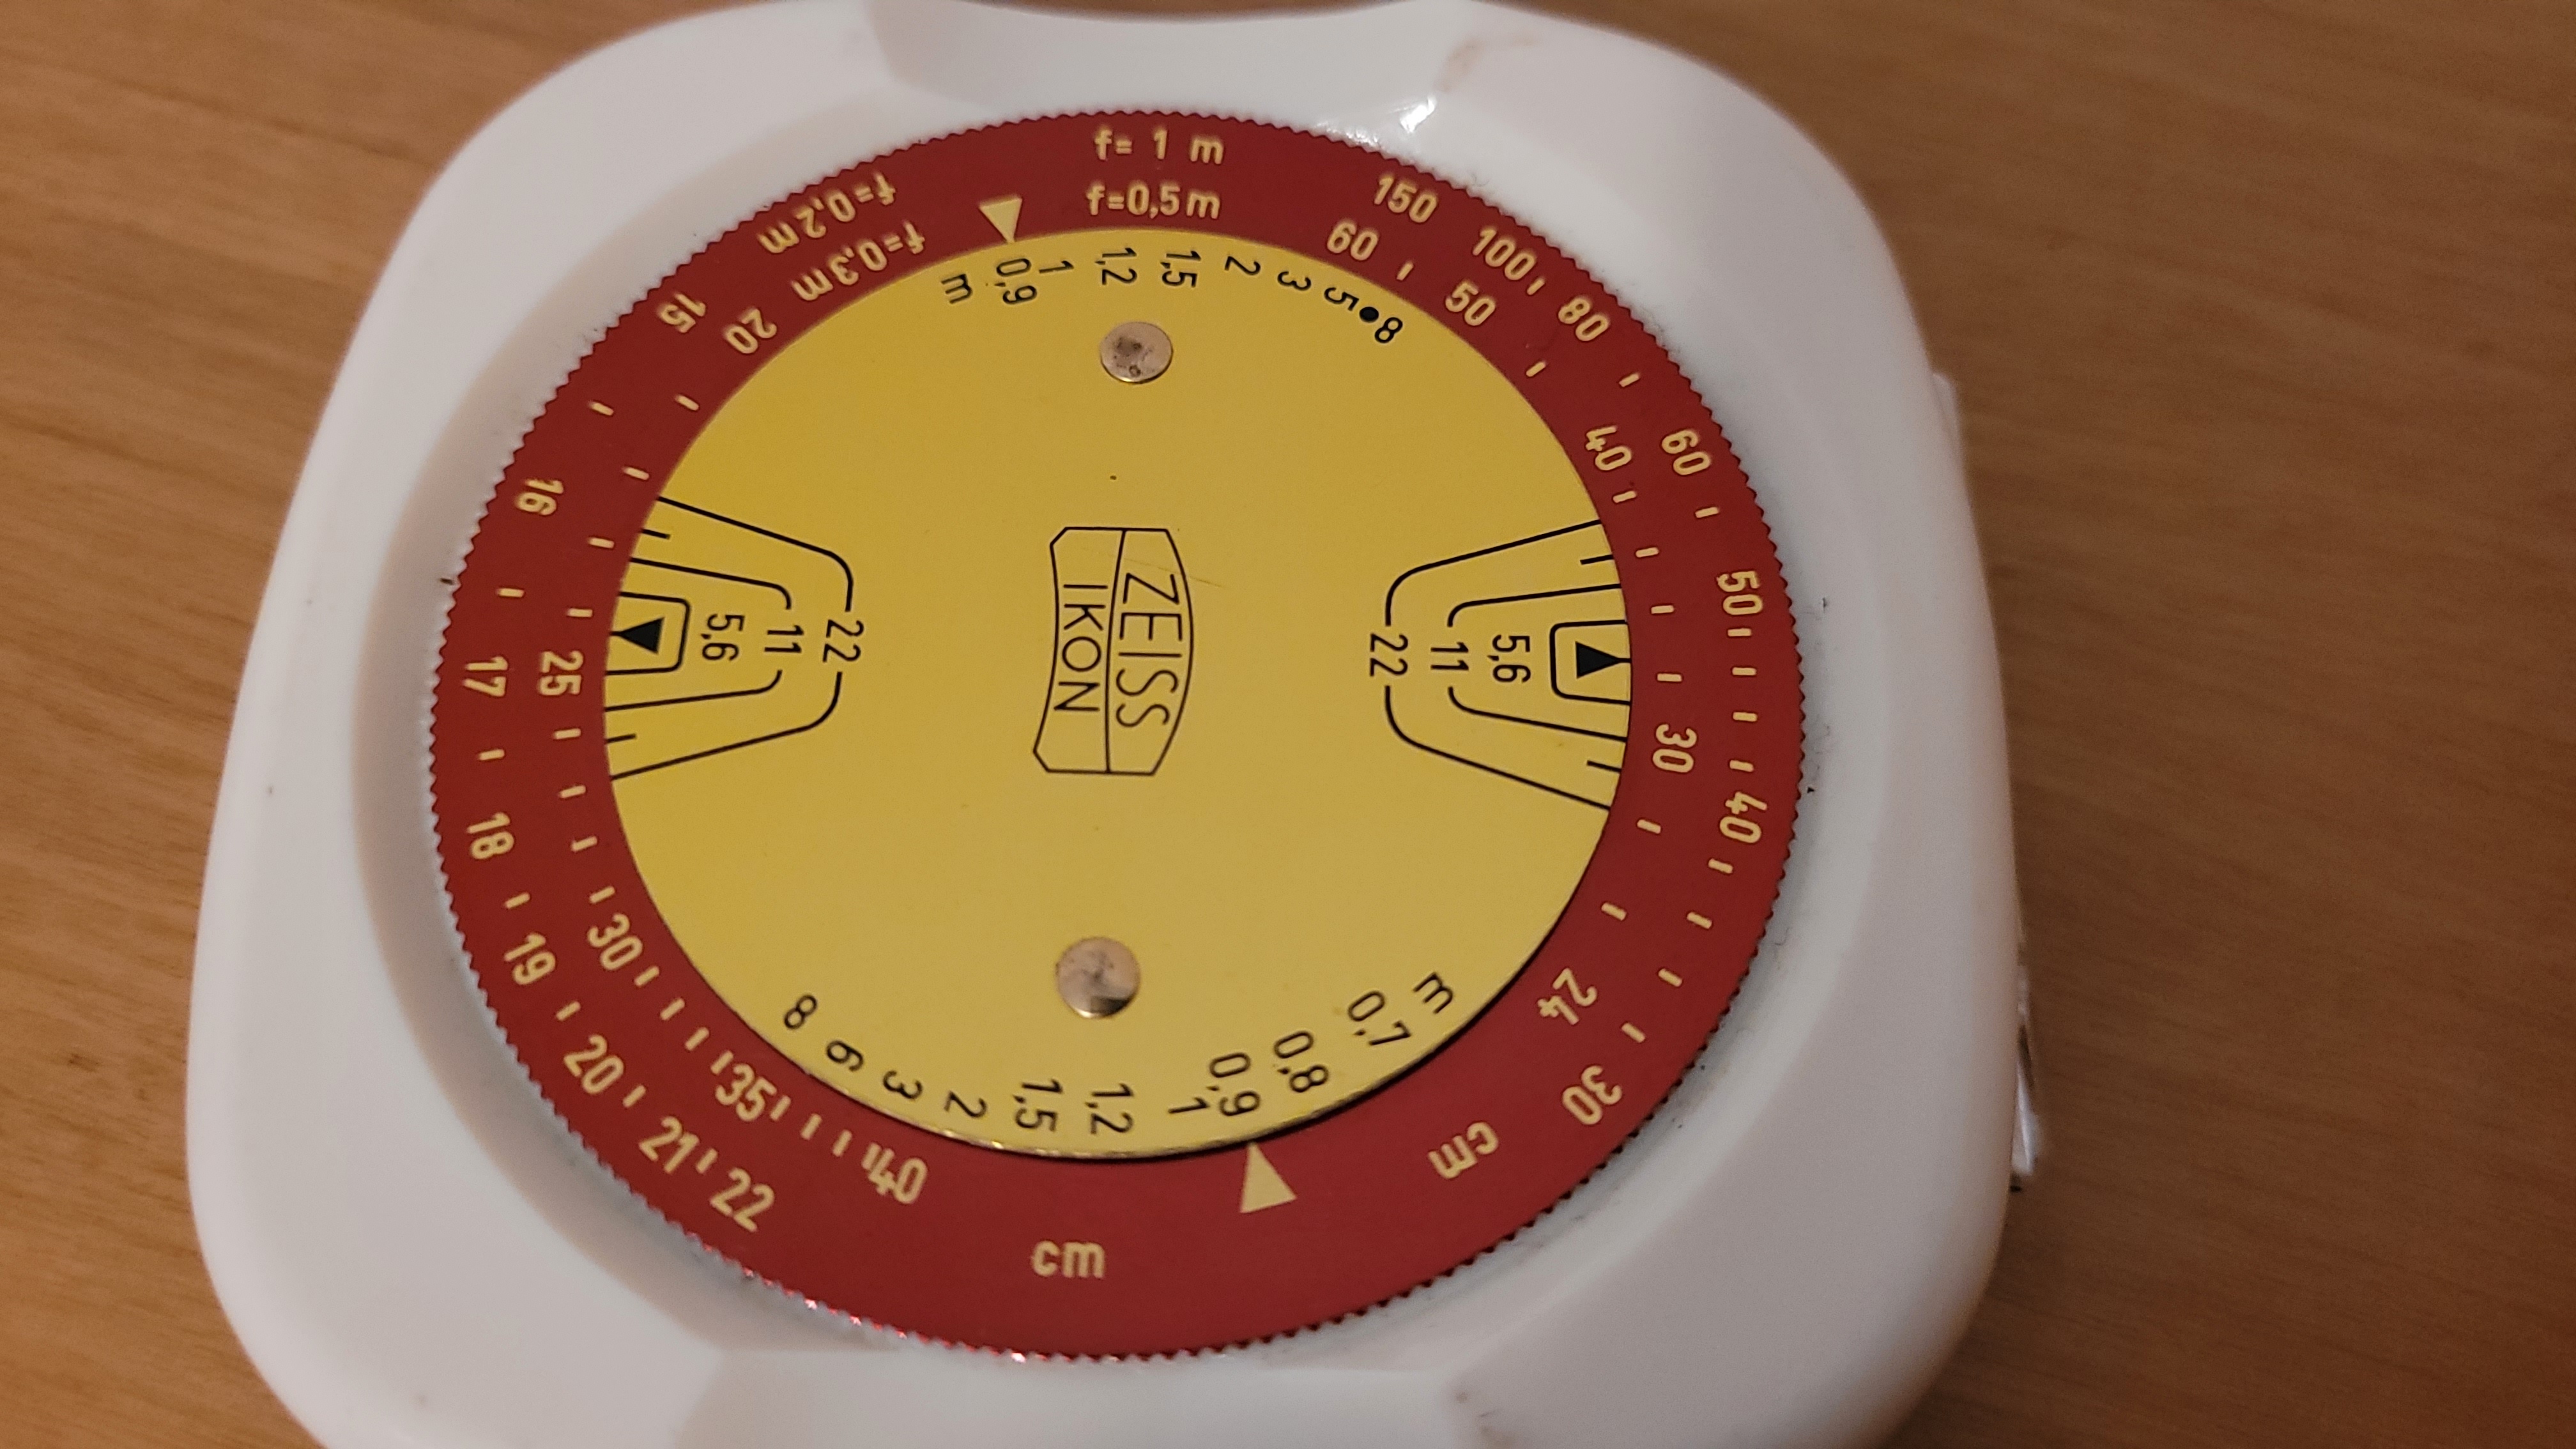
There have been different guiding tools/documents from Zeiss for photographers. Simple a table like the above in the Zeiss Ikon Contina manual. Or in the Zeiss Ikon “Red Box” which included various type of snap on and screw in lenses which had a scaler tool in the box and -if I’m not mistaken- a brochure for explanation. And lastly the scaler on the back of the case for 4 lenses. A simple plastic case with the metal scaler on the back.
Zeiss provided a focusing scaler to help you understand the depth of field and focus range when using Proxar lenses. The scaler shows you the near and far focus limits at different apertures, making it easier to achieve precise focus.
 Scaler Tool
For example, with the 0.2m Proxar lens and the camera set to 0.9m, the scaler indicates that the subject will be in focus at around 16.67 cm, which aligns with our earlier calculation.
Focus Range at Different Apertures:
| Aperture | Approximate Focus Range | Depth of Field (cm) |
|---|---|---|
| f/5.6 | 16.5 - 17.0 cm | 0.5 cm |
| f/11 | 16.3 - 17.3 cm | 1.0 cm |
| f/16 | 16.0 - 17.5 cm | 1.5 cm |
| f/22 | 15.8 - 17.9 cm | 2.1 cm |
The depth of field increases as you close the aperture, which is useful when you want more of your subject in focus. At f/5.6, the depth of field is only 0.5 cm, but by f/22, it expands to 2.1 cm.
Exact Focus Range for the 0.2m Proxar Lens at 0.9m Focus Setting
Here’s a detailed look at the exact focus range when using the 0.2m Proxar lens at 0.9m:
| Aperture | Near Focus (cm) | Far Focus (cm) | Focus Range (cm) |
|---|---|---|---|
| f/5.6 | 16.50 | 16.84 | 0.34 |
| f/11 | 16.35 | 17.01 | 0.66 |
| f/16 | 16.20 | 17.17 | 0.97 |
| f/22 | 16.03 | 17.36 | 1.33 |
Understanding Exact Focus Range Calculations
There are two key components to understanding how Proxar lenses affect your focus:
1. Fixed Focus Point (Subject Distance)
This is the exact distance at which the subject will be in sharp focus. It depends on the diopter strength of the Proxar lens and the focus setting of your main lens.
Formula:
\[\text{subject_m} = \frac{\text{scale_m}}{(\text{diopters} \times \text{scale_m}) + 1}\]2. Depth of Field (Focus Range)
Depth of field defines the range of distances over which objects appear acceptably sharp. A narrower aperture (higher f-number) results in a greater depth of field, which means more of your scene will be in focus.
Stacked Proxar Lenses
When you stack Zeiss Proxar lenses, you combine their magnification power for even closer focusing distances. Here’s how the lenses work when stacked:
| Stacked Proxar Lenses | Minimum Focusing Distance | Diopter Value |
|---|---|---|
| Proxar 0.2m + Proxar 0.3m | 11.11 cm | 8.33 diopters |
| Proxar 0.2m + Proxar 0.5m | 7.14 cm | 7 diopters |
| Proxar 0.2m + Proxar 1.0m | 5.88 cm | 6 diopters |
| Proxar 0.3m + Proxar 0.5m | 5.88 cm | 5.33 diopters |
| Proxar 0.3m + Proxar 1.0m | 4.44 cm | 4.33 diopters |
| Proxar 0.5m + Proxar 1.0m | 3.33 cm | 3 diopters |
How Stacked Proxar Lenses Work:
- Increased Magnification: The more lenses you stack, the closer you can focus. The total diopter value increases with each added lens, which reduces the minimum focusing distance even further.
- Creative Potential: This stacking ability offers incredible versatility in macro photography, allowing you to capture smaller subjects with greater detail.
This technique of stacking Proxar lenses is one of the key benefits of using these supplementary lenses with your Zeiss Ikon Contina IIa. The combined power of multiple lenses makes it possible to achieve extreme close-ups that would otherwise be difficult to achieve with the camera’s native lens alone.
Stacked Proxar Lenses (All Four)
When you stack all four Zeiss Proxar lenses, you can achieve extremely close focusing distances. Here’s the table showing the effect of stacking all the lenses:
| Stacked Proxar Lenses | Minimum Focusing Distance | Total Diopter Value |
|---|---|---|
| Proxar 0.2m + Proxar 0.3m + Proxar 0.5m + Proxar 1.0m | 2.5 cm | 11.33 diopters |
How Stacking All Four Proxar Lenses Works:
- Maximum Magnification: With all four lenses stacked, the total diopter value becomes 11.33 diopters, allowing you to focus as close as 2.5 cm.
- Extreme Close-ups: This setup is ideal for capturing the finest details of tiny subjects in macro photography.
- Depth of Field: Keep in mind that with extreme magnification, depth of field becomes very shallow, so precise focus is crucial.
This extreme stacking setup can be used for high-magnification photography when you need to capture intricate details, such as textures, small objects, or insects.
Shutter Speed Adjustment with Proxar Lenses
When using Zeiss Proxar lenses, you may need to adjust your shutter speed because these lenses change how light enters the camera. Since Proxar lenses allow you to focus closer, less light reaches the film, which may result in underexposure. To compensate, you can:
- Decrease the shutter speed (use a slower exposure time) to let in more light.
- Widen the aperture (if your lens allows it) to gather more light.
A good starting point is to adjust the shutter speed by 1-2 stops slower when using Proxar lenses to ensure your photos are correctly exposed.
Rule of Thumb for Stacked Proxar Lenses
When stacking Zeiss Proxar lenses, you generally need to adjust exposure due to the increased magnification:
- Each additional Proxar lens in the stack reduces the amount of light, so you need to reduce exposure by 1 stop (either by using a slower shutter speed or smaller aperture).
Example:
- 1 Proxar lens: Adjust by 1 stop.
- 2 Proxar lenses: Adjust by 2 stops.
- 3 Proxar lenses: Adjust by 3 stops.
This helps compensate for the light loss when stacking the lenses.
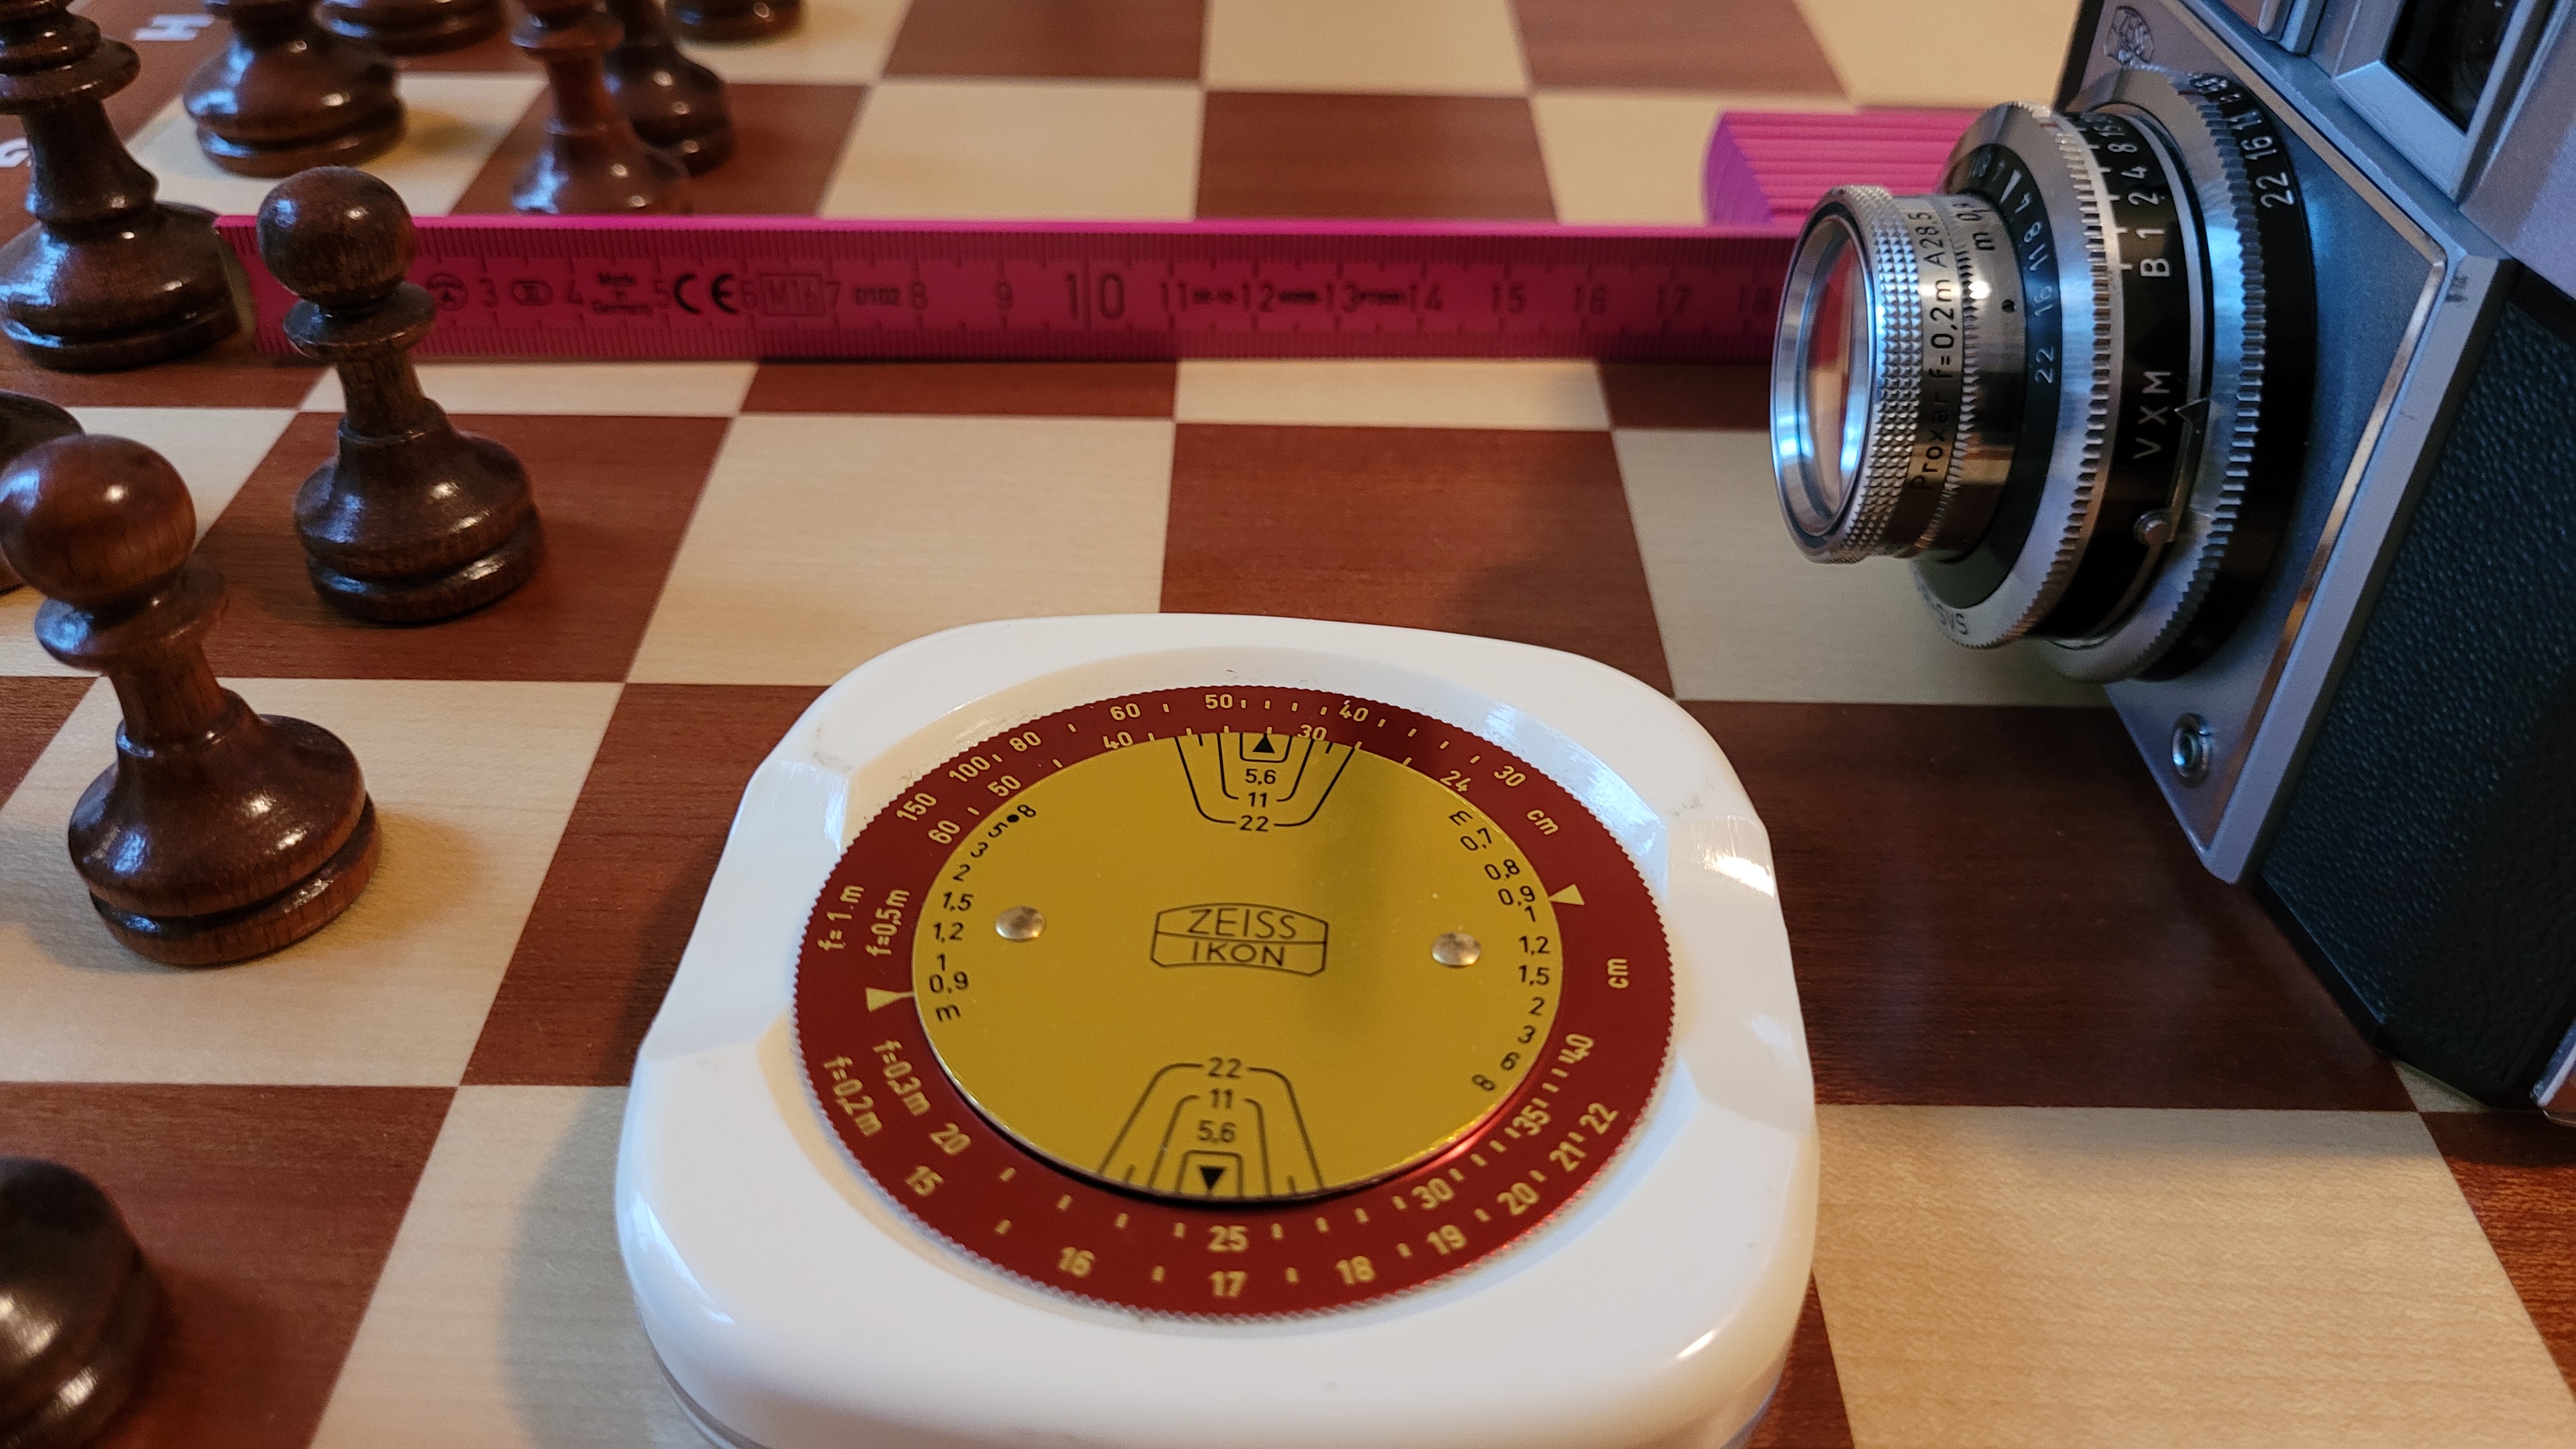
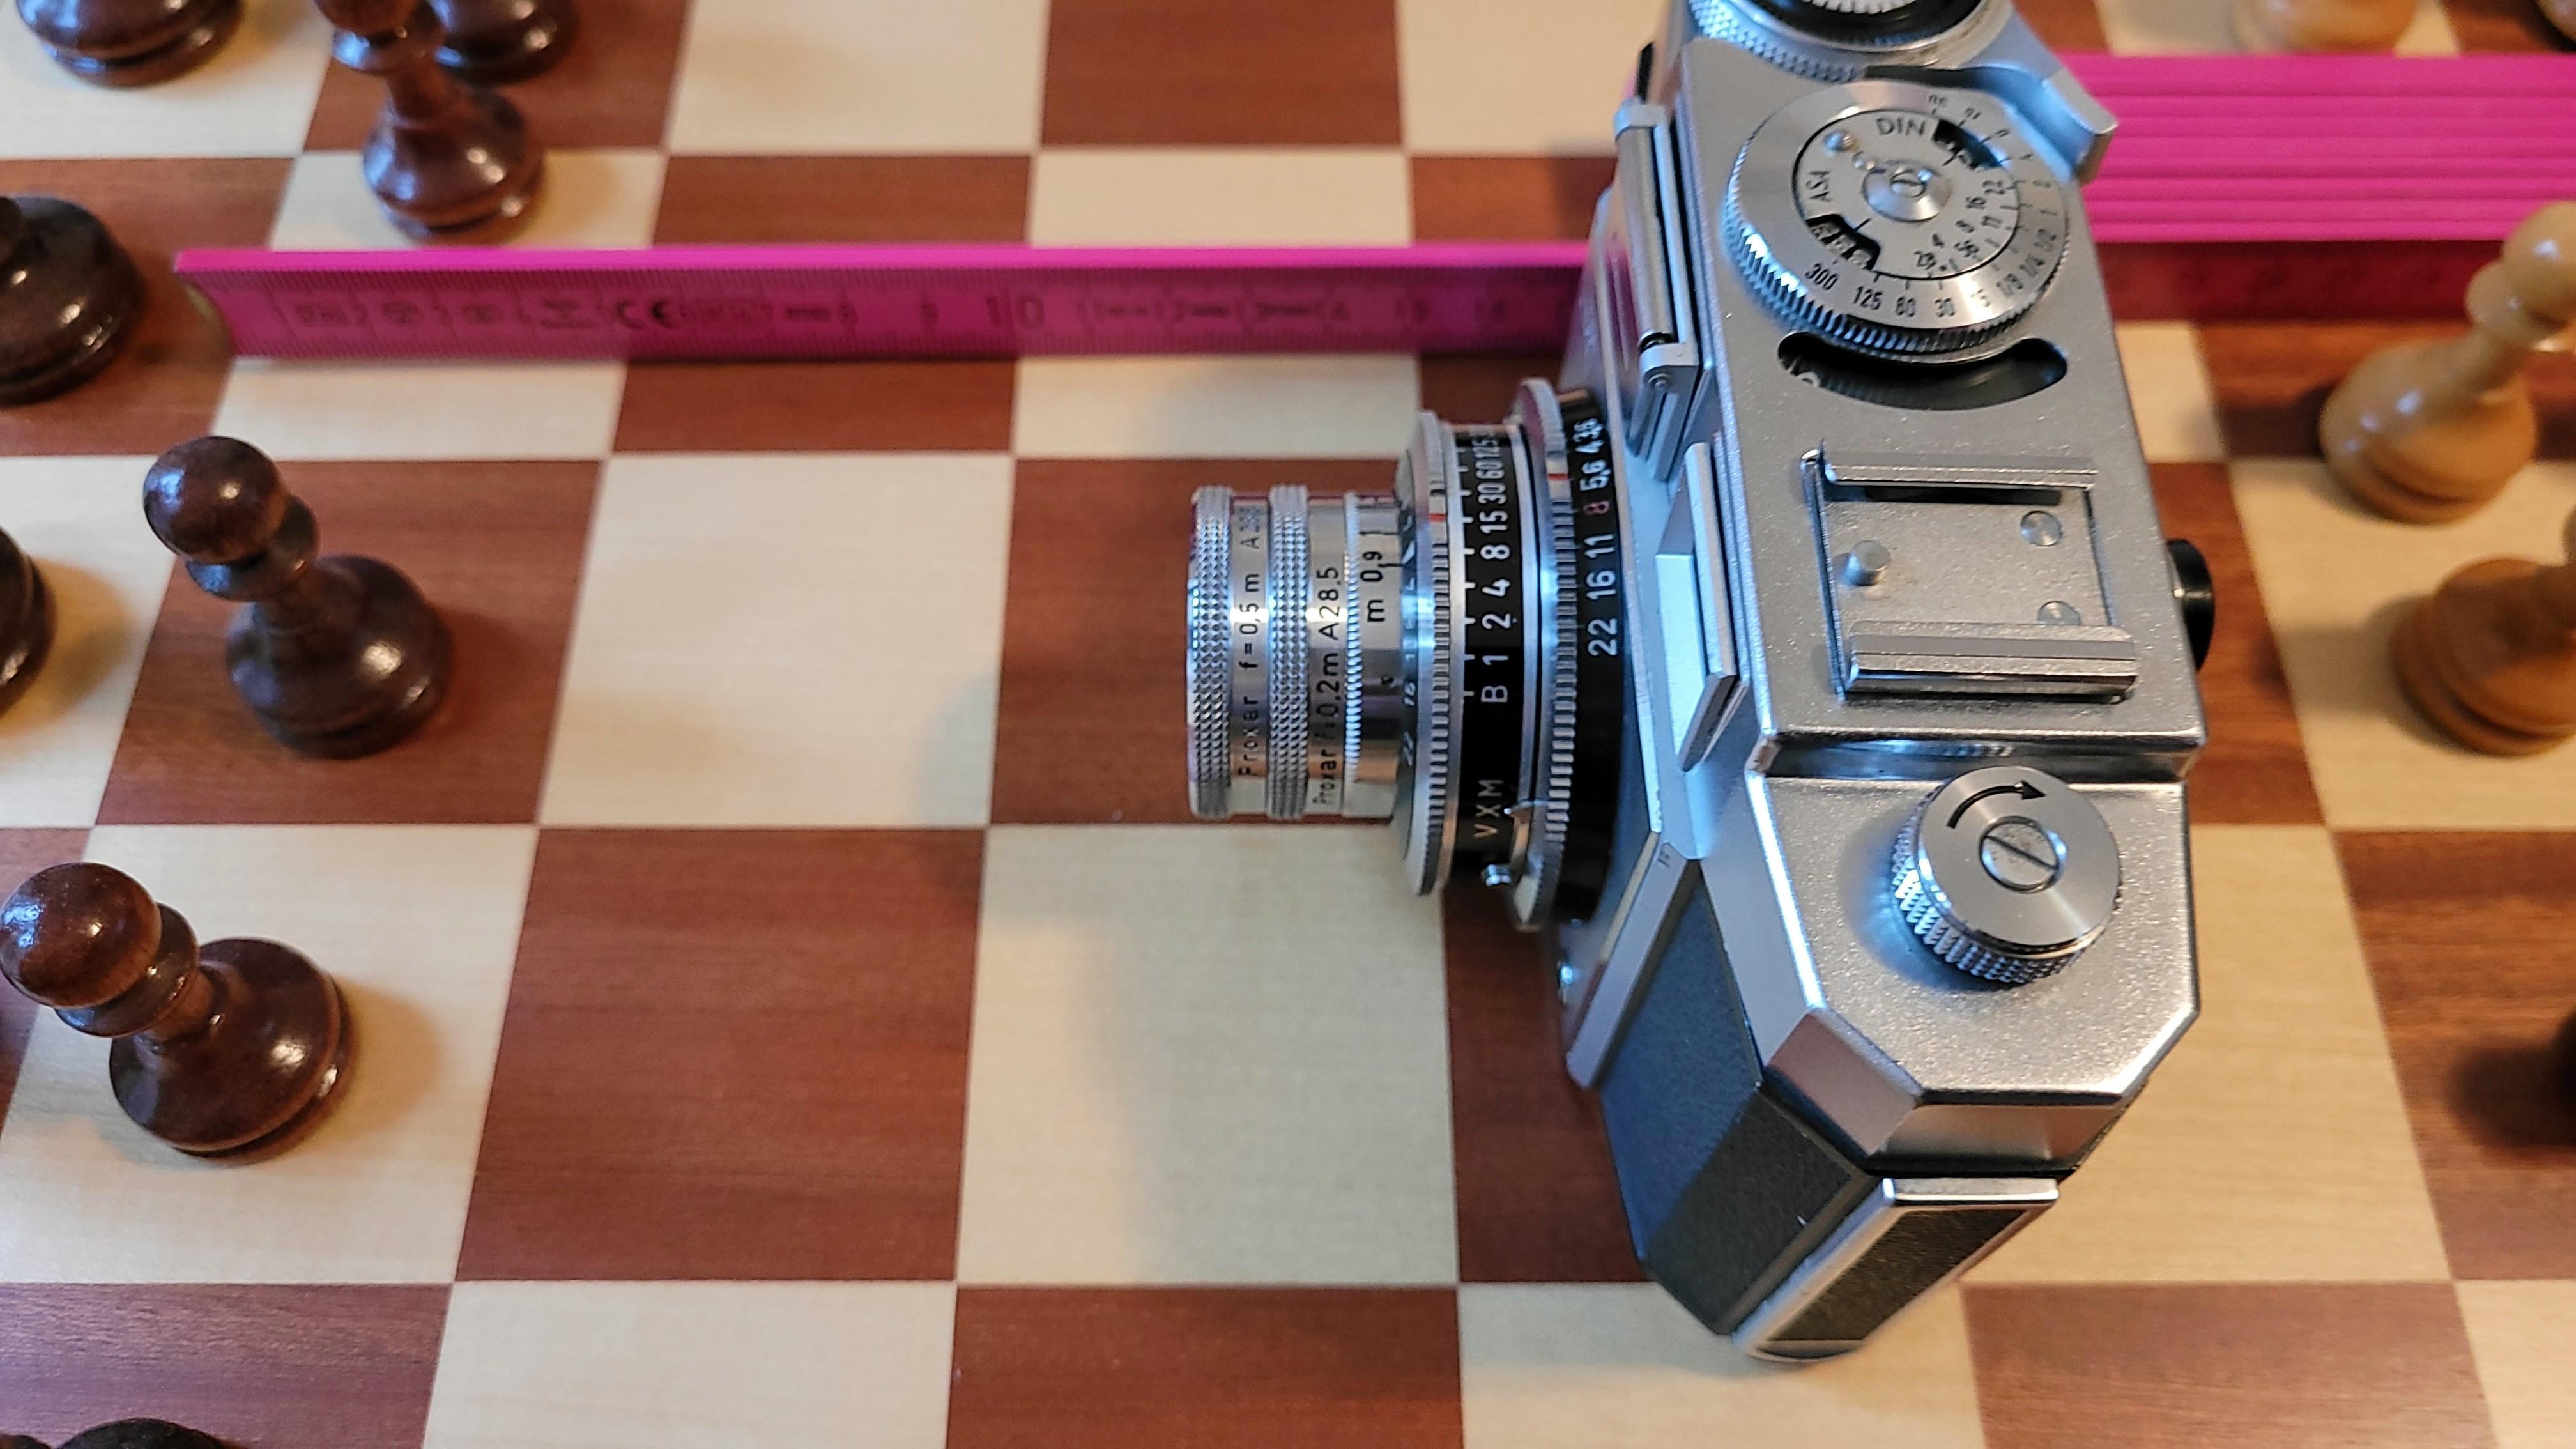
Test Setup
Continuing with the example 0.9m distance and Proxar 0.2m here is a simple test setup to prove theory against reality.


Conclusion
Using Zeiss Proxar lenses with the Zeiss Ikon Contina IIa unlocks fantastic possibilities for close-up and macro photography. These lenses allow you to focus as close as 16.67 cm, enabling you to capture highly detailed images of small subjects. By understanding the relationship between diopters, subject distance, and depth of field, you can fully unlock the creative potential of these lenses for precise macro shots.
This write-up is based on my experience from 4-5 decades ago, combined with some recent research to relearn these techniques.
I’ll use the above test setup to ensure my memory is accurate.
What I still don’t know is whether the Proxar lenses include parallax correction.
Please leave a comment or drop me a note in the Contact section of the webpage to improve this blog, correct me if I’m wrong, or add anything I may have missed. I hope this is helpful for all analog photography enthusiasts and those who appreciate the rich history of these German engineering masterpieces.
Overview video with test roll result
A Special Thanks
I want to extend my gratitude to Natalie Rosella Boonzaier, a professional photographer whose insightful questions about the Proxar lens scaler inspired me to document my findings in this blog. Her passion for photography and creative approach continue to motivate and inspire analog enthusiasts like me.
Please check out her YouTube channel for more amazing photography content!
Thanks for reading!
If you find value in my content, consider supporting me with a virtual coffee ☕️ or a beer 🍺.
Your contributions help keep this blog thriving.
© 2024 Henry
