Lens: Zeiss Tessar 4.5 / 10.5cm
Camera Serial Nr.: F23627
Lens Serial Nr.: 2203535
Shutter Speeds: B, 1s, 1/2s, 1/4s, 1/10s, 1/25s, 1/50s, 1/60s, 1/100s, 1/250s
Aperture Values: f/4.5, 5.6, 8, 11, 16, 22, 32 (tested and fully functional)
Accessories:
- Yellow Filter from 1938 (Carl Zeiss Jena) with original bakelite box
- 6x9 viewfinder Zeiss 437/2
- Zeiss Ikon 10” shutter release cable (thumb-activated design with screw lock)
How to Shoot the Zeiss Ikon Ikonta 521/2
Taking photos with an analog camera is an entirely different experience from digital photography, and using a vintage camera like the Zeiss Ikon Ikonta 521/2 adds another layer of uniqueness. It’s not just about the image; it’s about embracing the photography process—slowing down, thinking through each shot, and learning its mechanics.
Setting the Context
In today’s digital age, where instant results and automatic adjustments are the norm, it’s easy to lose context when evaluating cameras like the Zeiss Ikon Ikonta 521/2. These cameras shouldn’t be judged against modern models but appreciated for the engineering marvels they were in their time—and the fact that they still work today! They offer a tactile, hands-on experience, reminding us that photography wasn’t always about pixels per inch or ISO levels but about mastering light, composition, and the mechanics of the device.
The Ikonta 521/2 isn’t a high-tech marvel by today’s standards, but its simplicity is its beauty. In an age of “point and shoot,” the Ikonta forces you to engage in every part of the process, from setting focus to gauging exposure. And for many, that’s the appeal.
A Camera from a Different Era
The Zeiss Ikon Ikonta 521/2 is a medium-format camera that takes 8 images (6x9 cm) on 120-type roll film. When folded, it measures 155x81x43 mm and weighs 680 grams without film, making it fairly portable for a medium-format camera.
Notable features include two tripod sockets (for landscape and portrait orientation) and the option to add a flip-up two-lens optical viewfinder. The shutter is manually cocked, with speeds ranging from 1 second to 1/250 of a second plus B (bulb mode). However, these specifications can vary based on the lens and shutter combination used, which is what my camera has.
The camera lacks a built-in rangefinder, meaning the distance to your subject needs to be measured or estimated, and the focus ring adjusted accordingly. Additionally, it has no light meter, so you’ll need an external one or rely on estimation (or apps, which I’ll cover shortly).
Despite its minimalist design, the Ikonta wasn’t considered a budget camera when it was released. Its solid build and precision engineering reflected the high quality that Zeiss was known for. You might not get the convenience of automatic settings, but the trade-off is a beautifully crafted piece of history that still delivers impressive images.
Loading the Film
One of the first challenges you’ll encounter is loading the film. The 521/2 uses 120 roll film, which may seem intimidating at first if you’re not familiar with it, but it’s fairly straightforward once you get the hang of it. You need to make sure the film is loaded tightly and that the film advance is correct, as there’s no automatic stop. Use the red window on the back of the camera to see the frame numbers on the paper backing of the film, advancing carefully after each shot.
Using Your Phone as a Light Meter
Without a built-in light meter, exposure has to be gauged manually. Fortunately, modern technology offers a convenient solution. Apps on your smartphone can function as a light meter, offering accurate readings of light levels and helping you set the aperture and shutter speed on your Ikonta. Popular apps include “LightMeter” for Android and “myLightMeter” for iOS, both of which emulate traditional analog light meters.
Getting the Camera Ready
Before taking a shot, make sure you’ve set the camera correctly:
Focus: Since there is no rangefinder, you’ll need to estimate or measure the distance from your subject. Remember to adjust the focus ring accordingly.
Speaking of focus, there is one option to set focus to infinity, also known as a “quick shot.” You essentially set everything on the red dots, then choose the appropriate shutter speed.
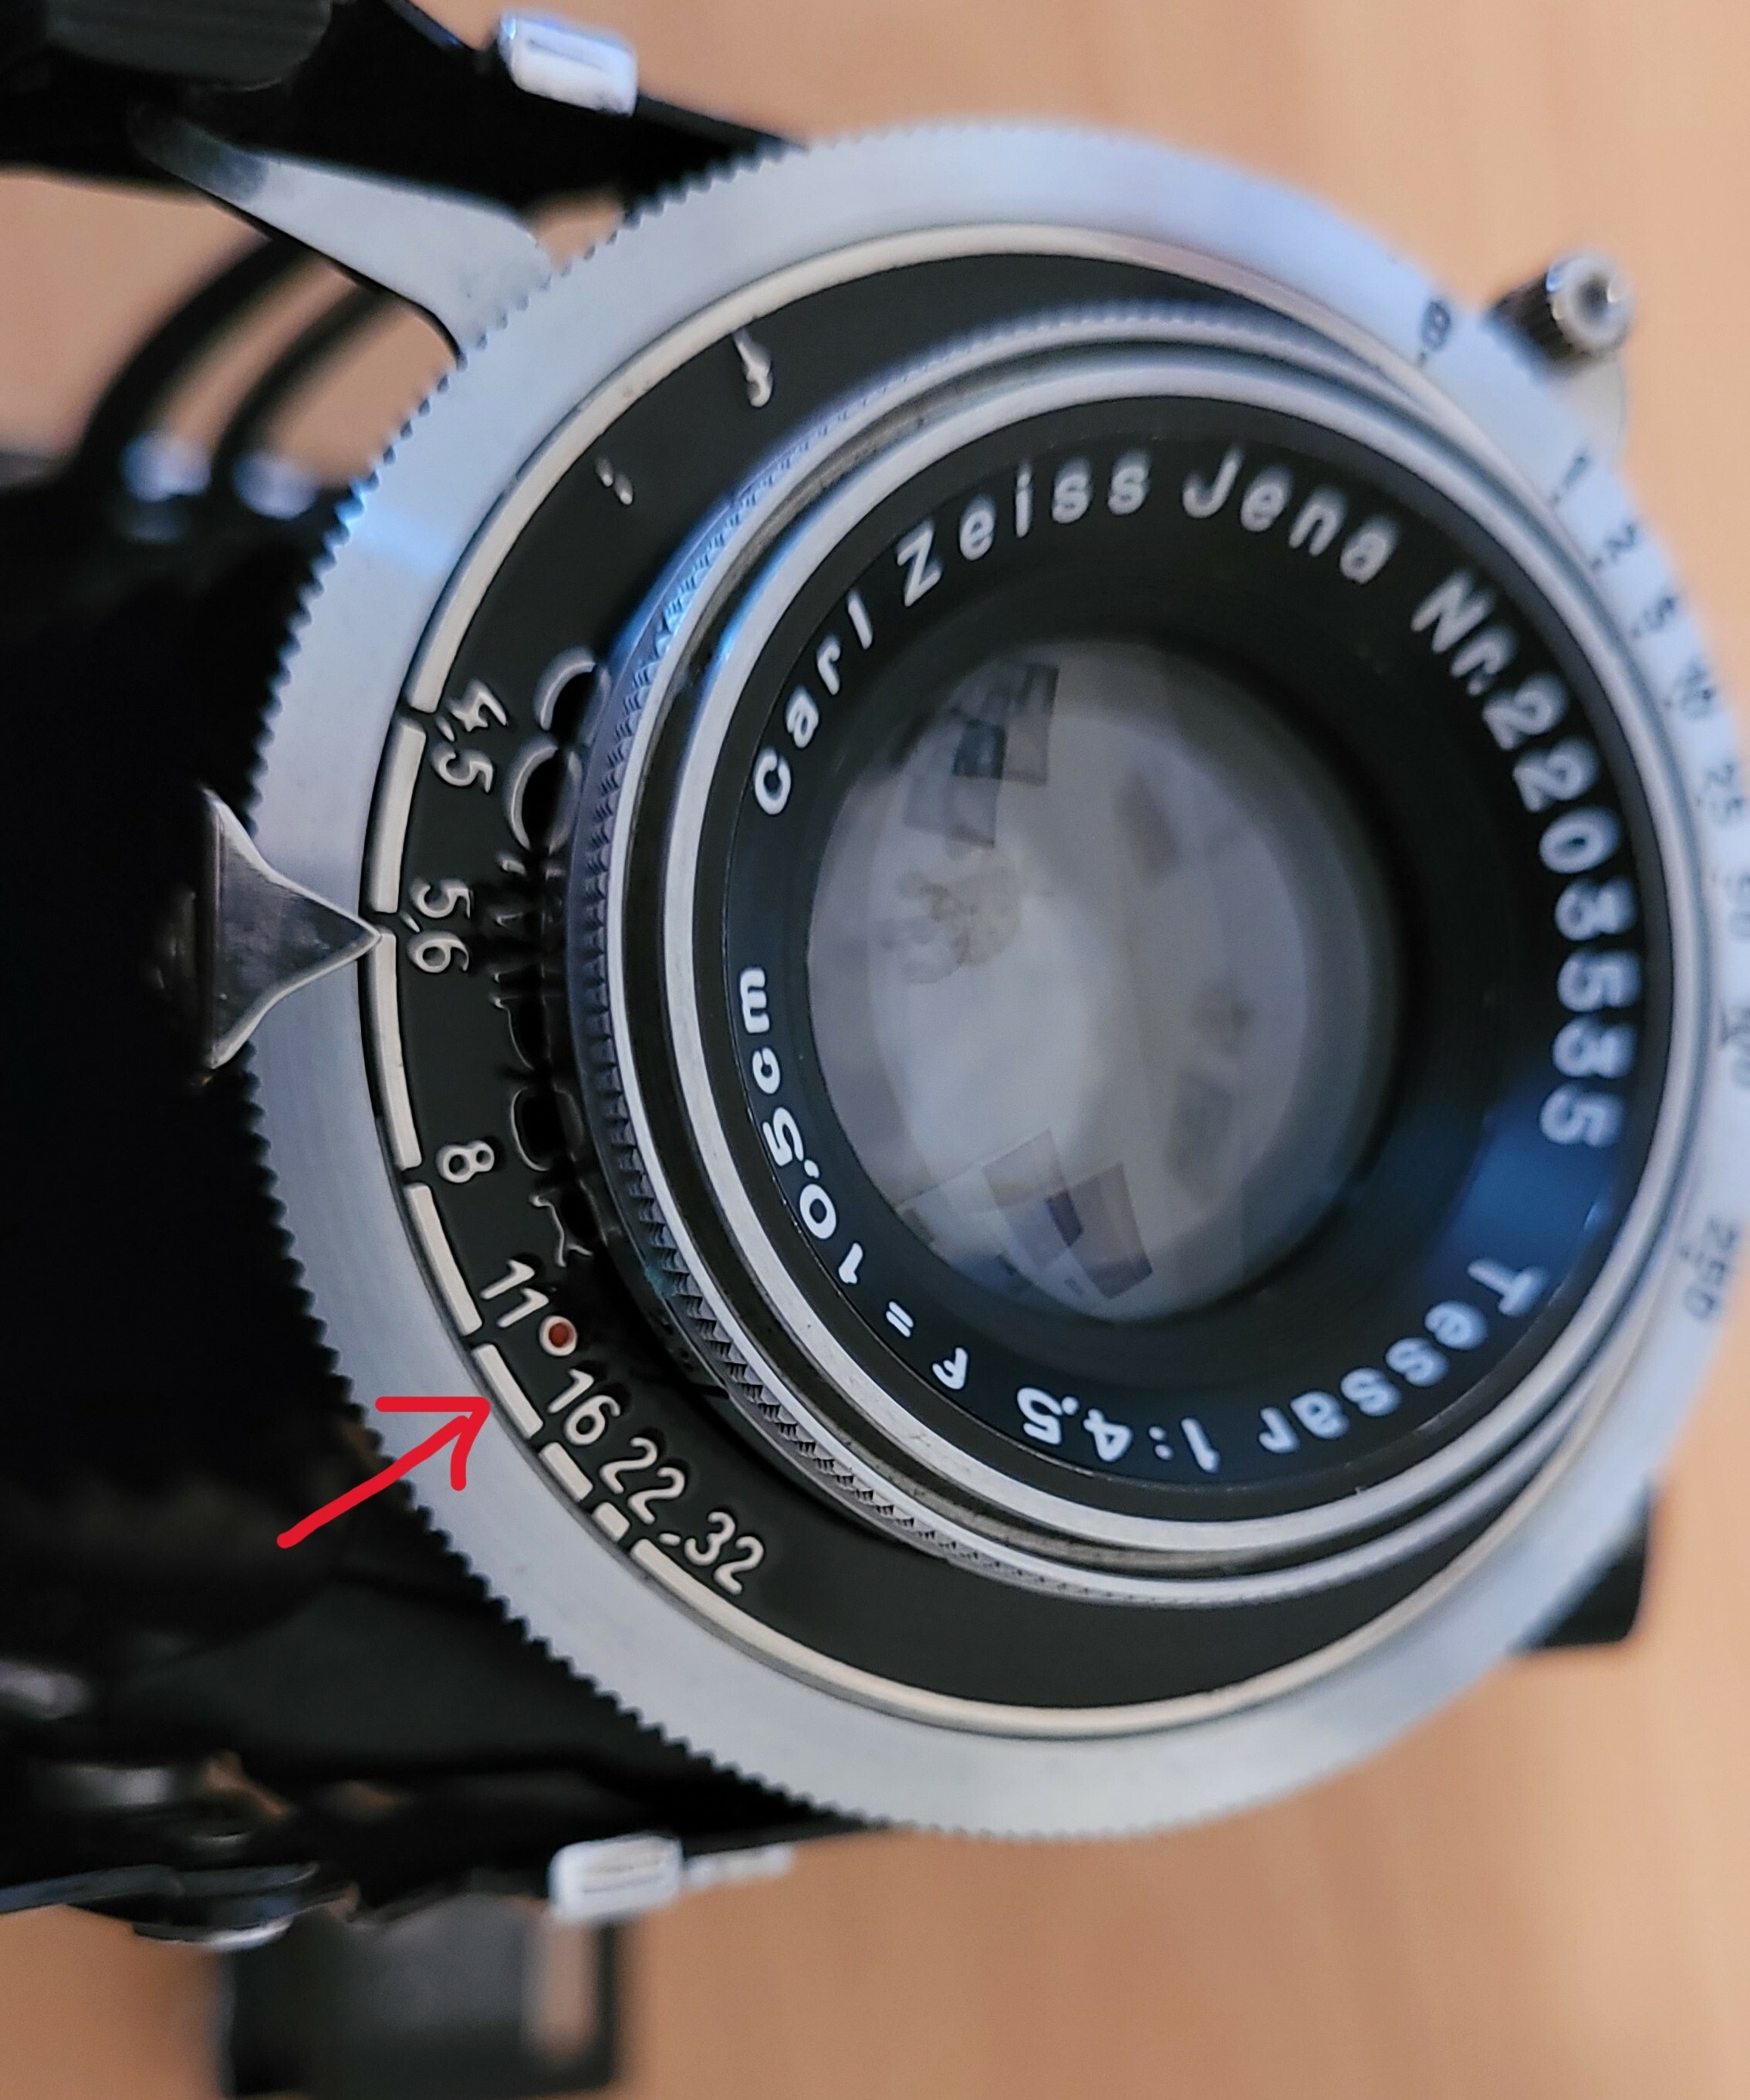
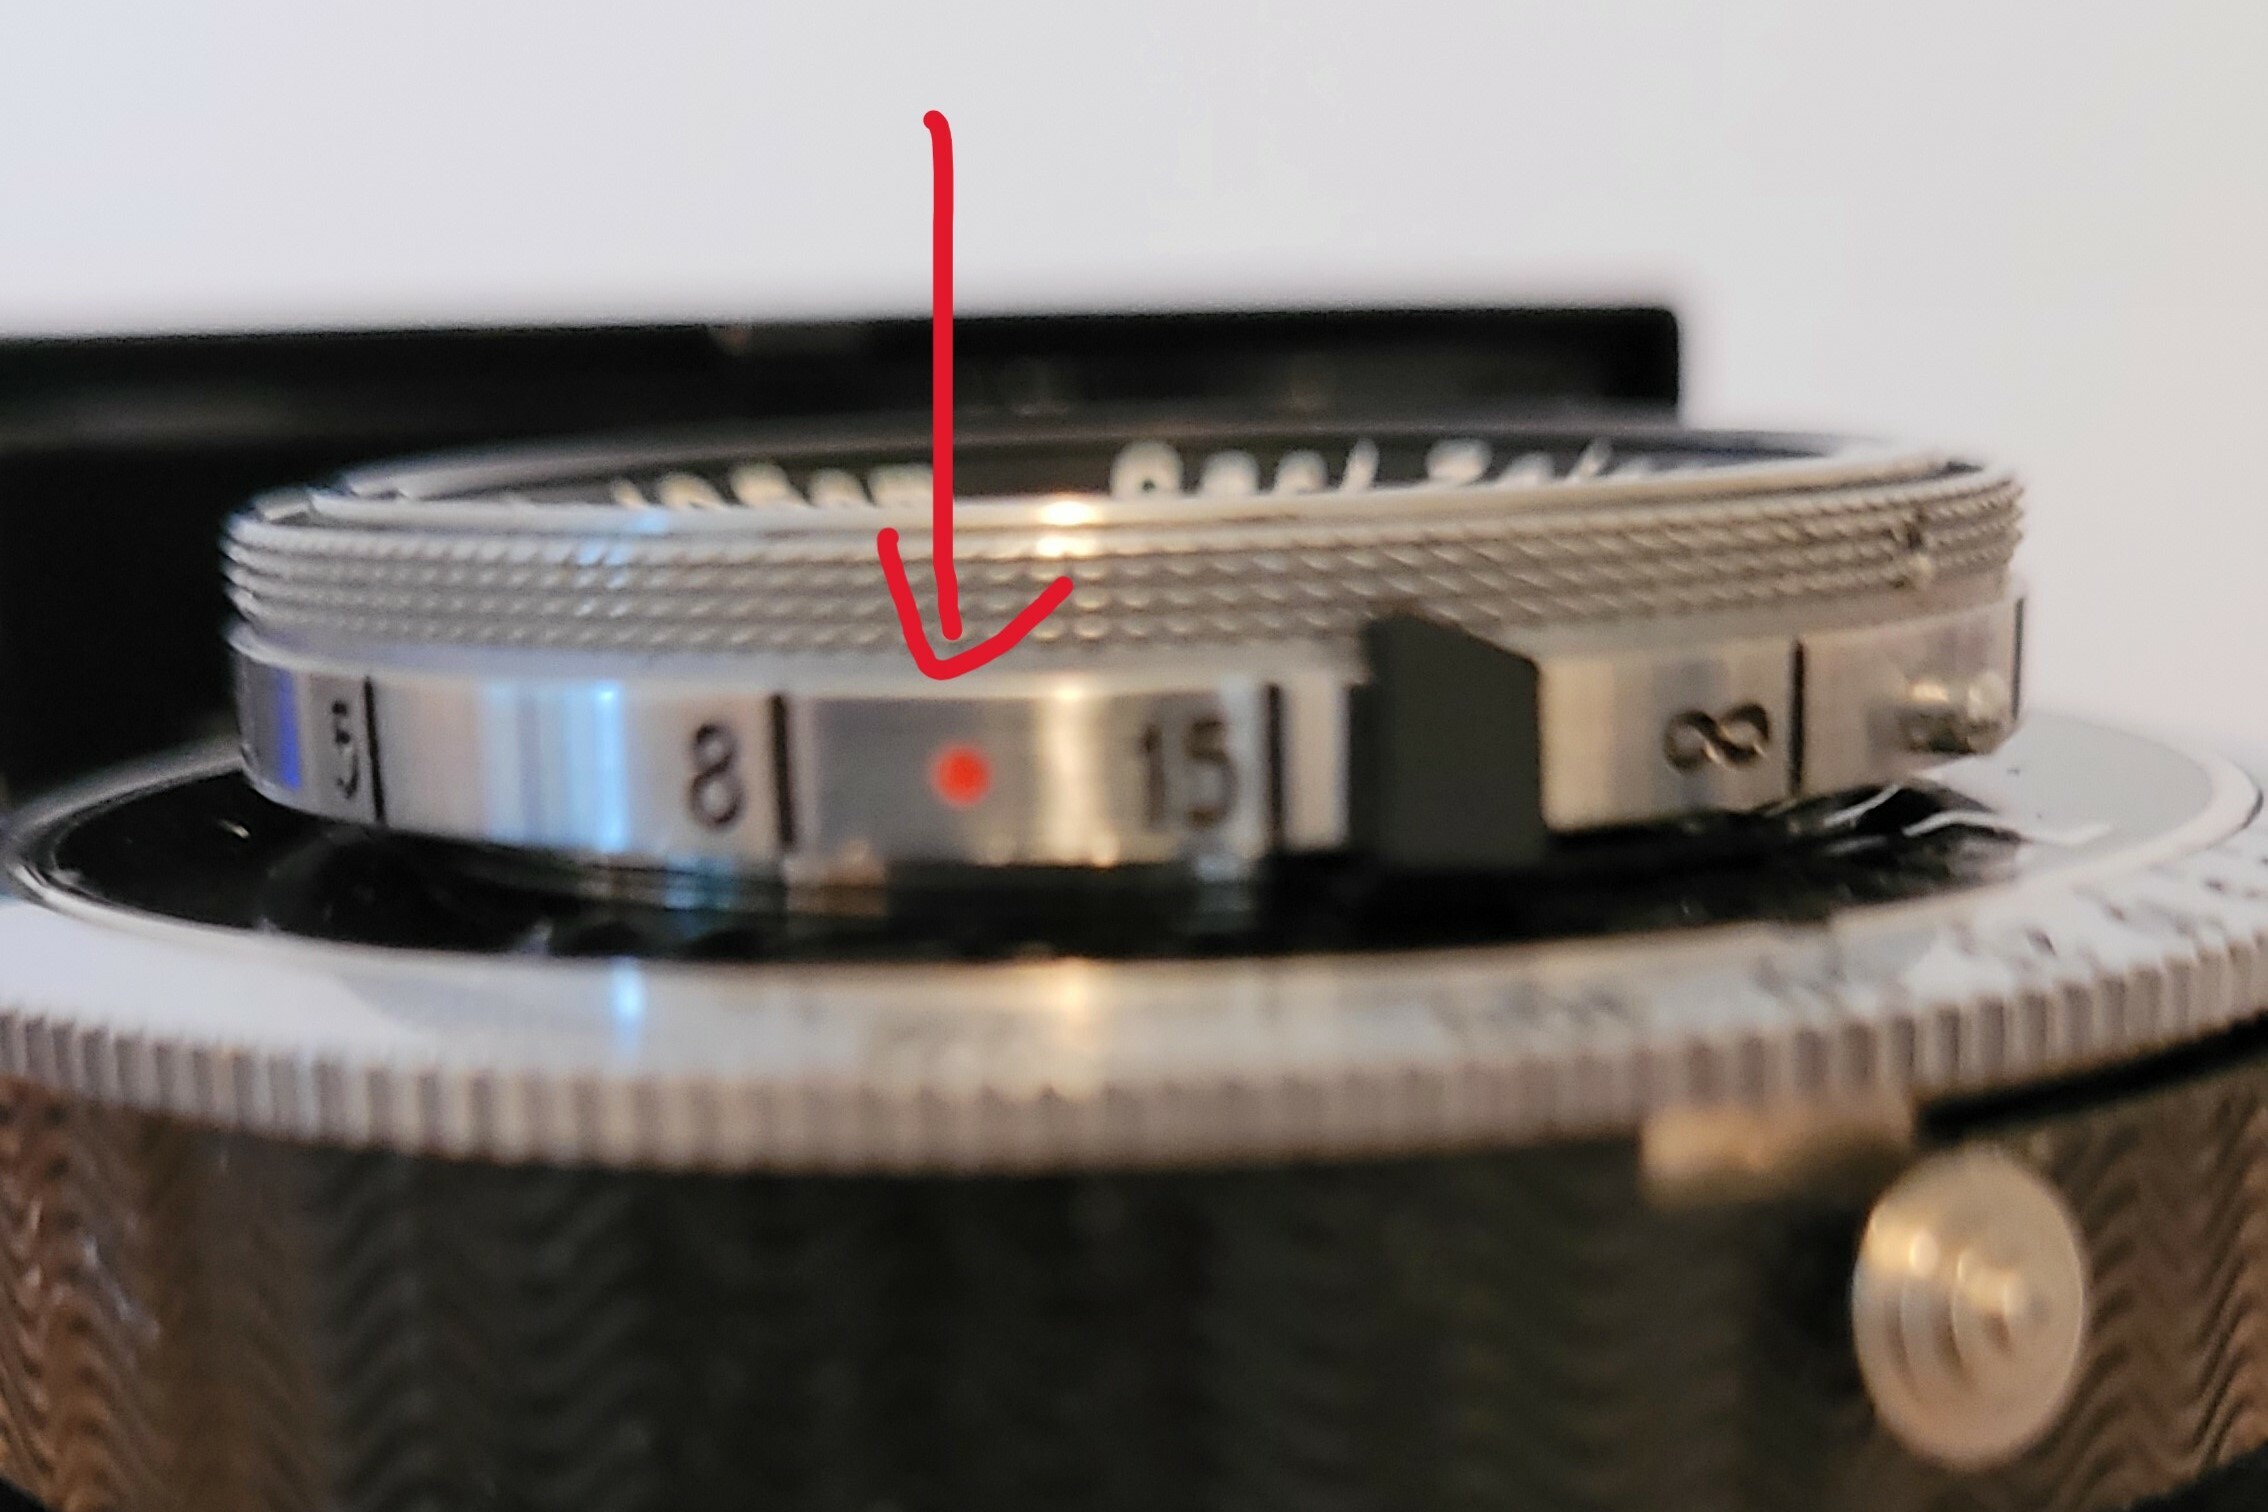
The distance-to-subject is adjusted by rotating the lens’s front element with the distance scale.
Shutter Speed & Aperture: Use your external light meter or app to determine the correct exposure settings. Adjust the aperture ring (often around f/4.5 to f/32 on most Ikontas) and the shutter speed accordingly.
Frame Your Shot: Look through the simple optical viewfinder or use an optional flip-up one if you have it. Keep in mind that the viewfinder offers only a rough framing of the shot. If you have the 6x9 viewfinder Zeiss 437/2, you’ll use it similarly to how you would with a TLR.
Cock the Shutter: Don’t forget to manually cock the shutter before pressing the release. Never, ever change the shutter speed after you’ve cocked the shutter—NEVER!
The 1/250th sec. shutter speed is powered by an extra internal spring, unique to this speed. It’s normal for setting this speed to feel slightly stiffer than others. The correct procedure is to set the shutter speed to 1/250 before cocking the shutter. Again, do not cock the shutter first and then try to set it to 1/250, as this will create resistance and could cause damage.
Advance the Film: After each shot, use the film advance knob and check the red window for the next frame number. Make it a habit to open the bellows before advancing the film! This will reduce the dust that could land on your lens.
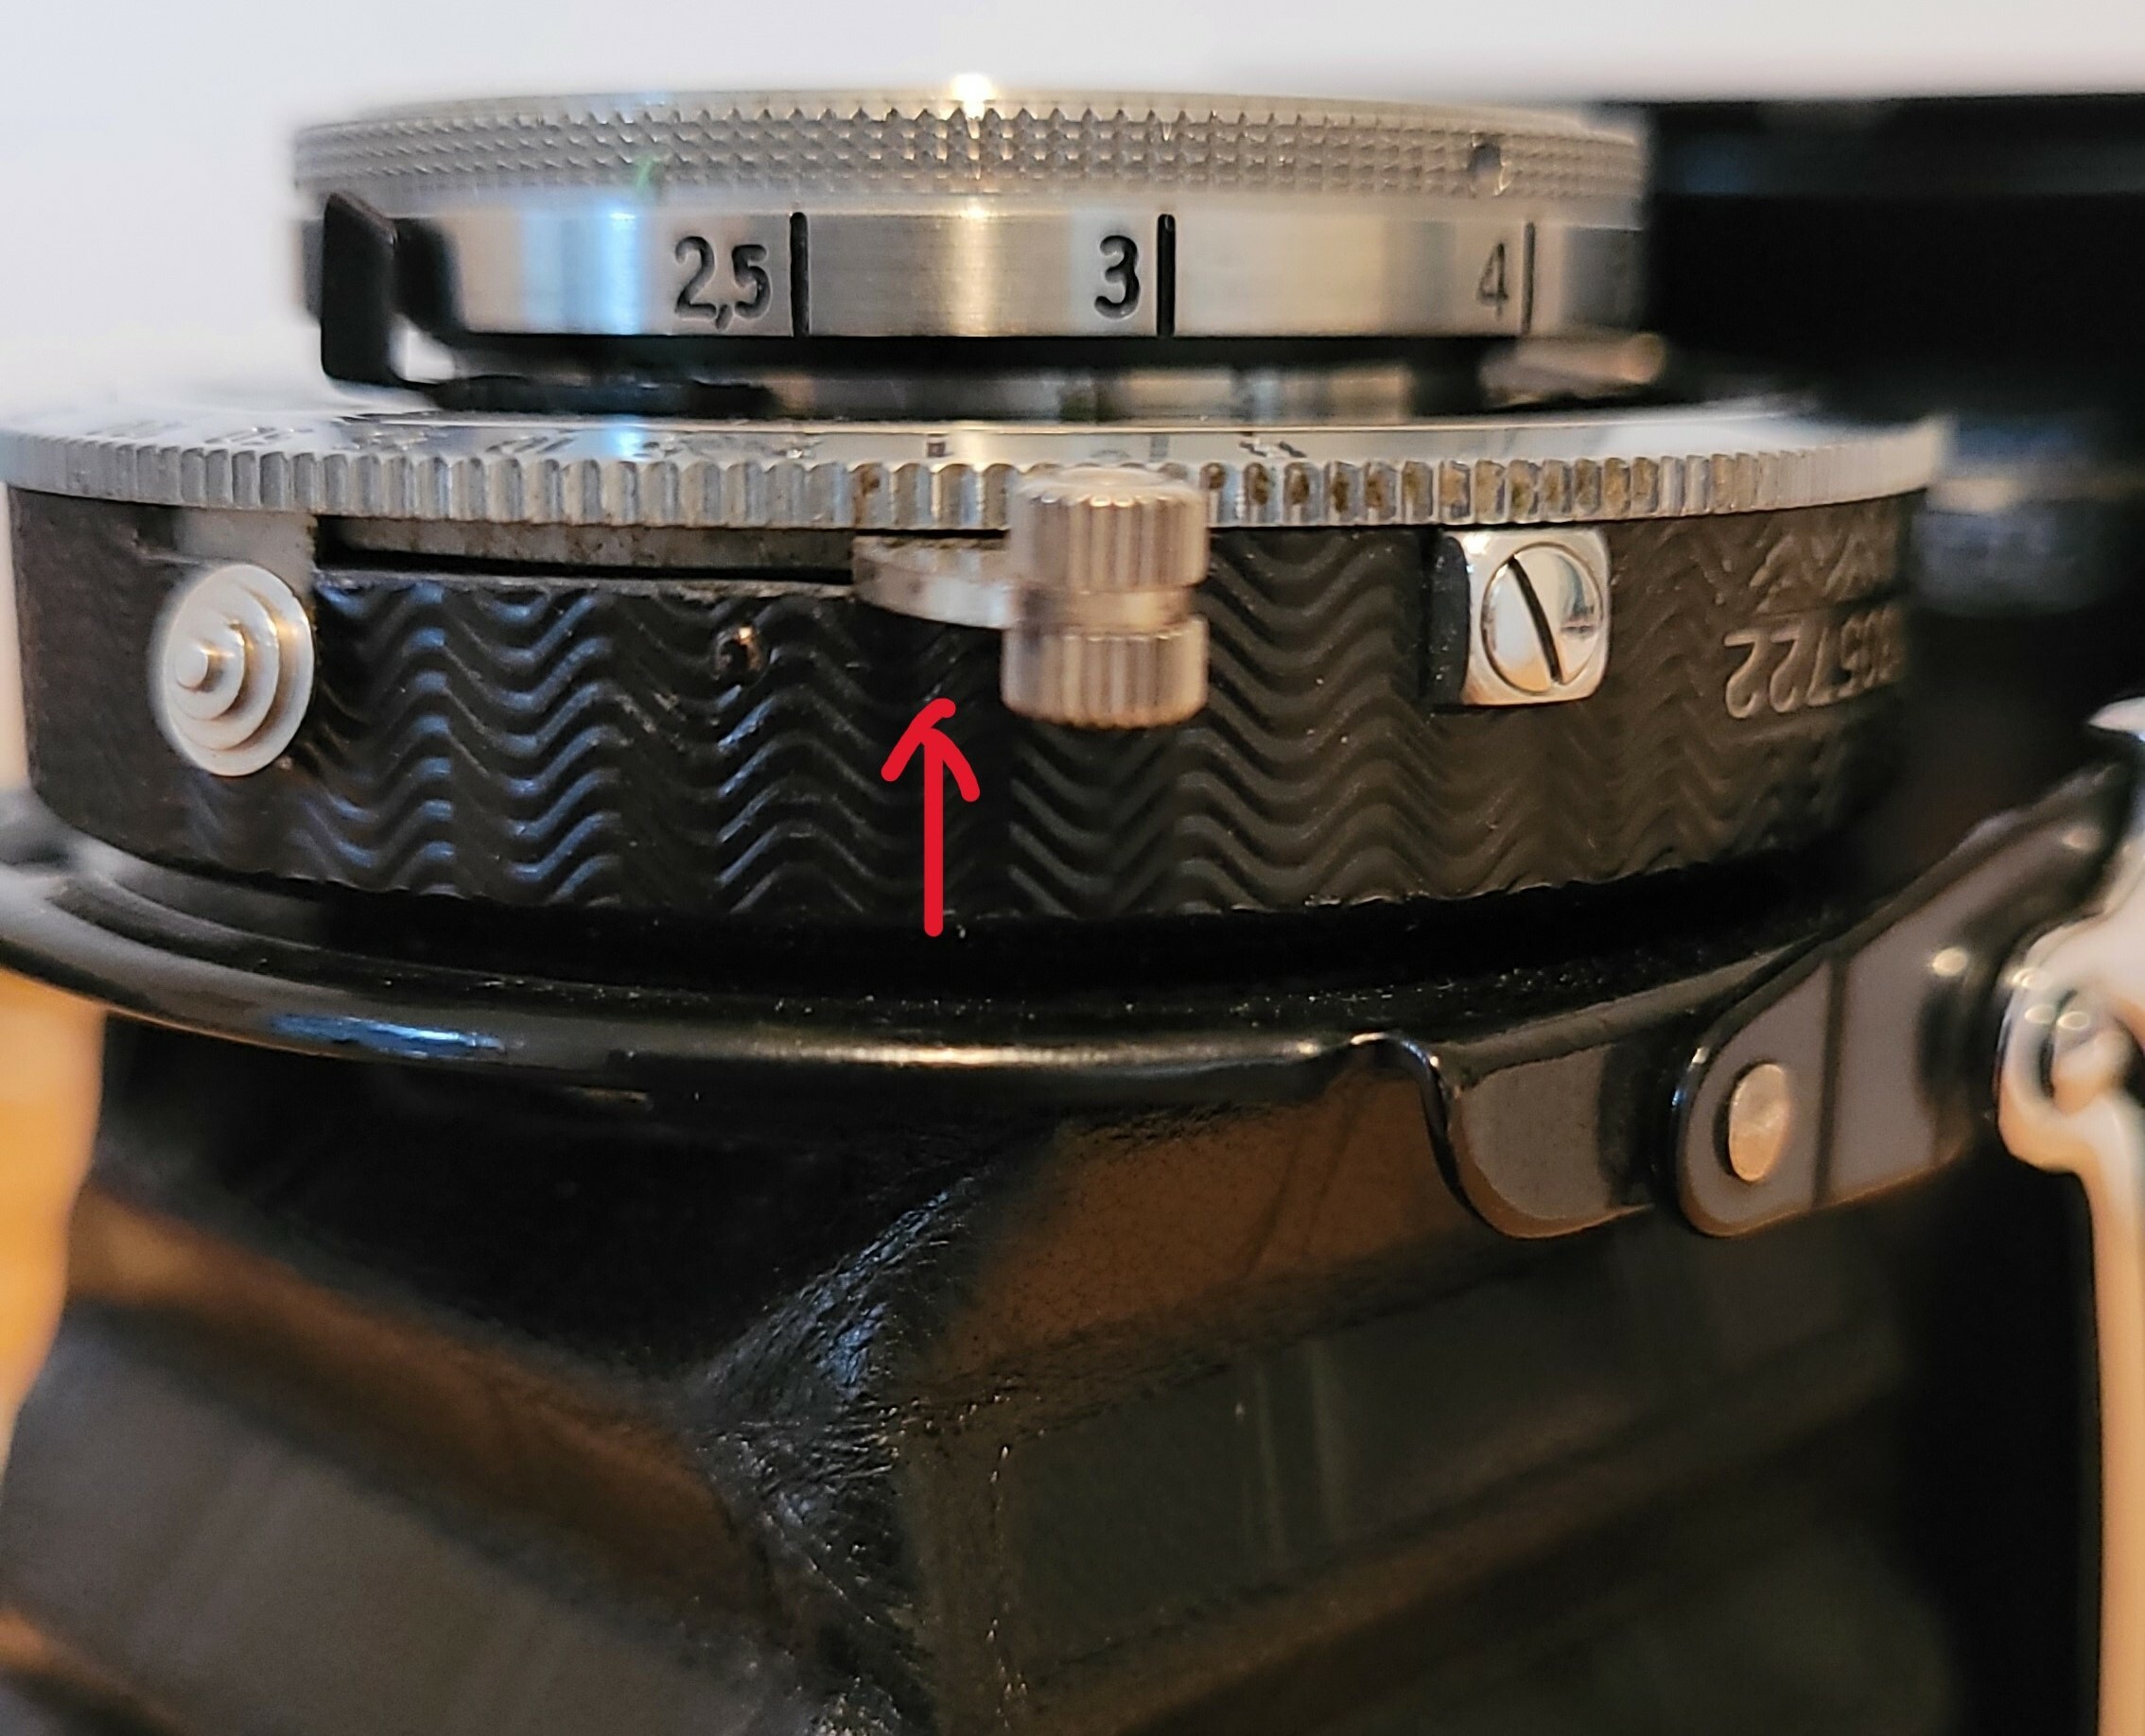
You’ll see a red dot on the winder, which signals the next frame is loaded and the film is ready for exposure. If you want to double-expose, that’s possible when you “overrule” the double-exposure protection and manually release after cocking the shutter with this lever.
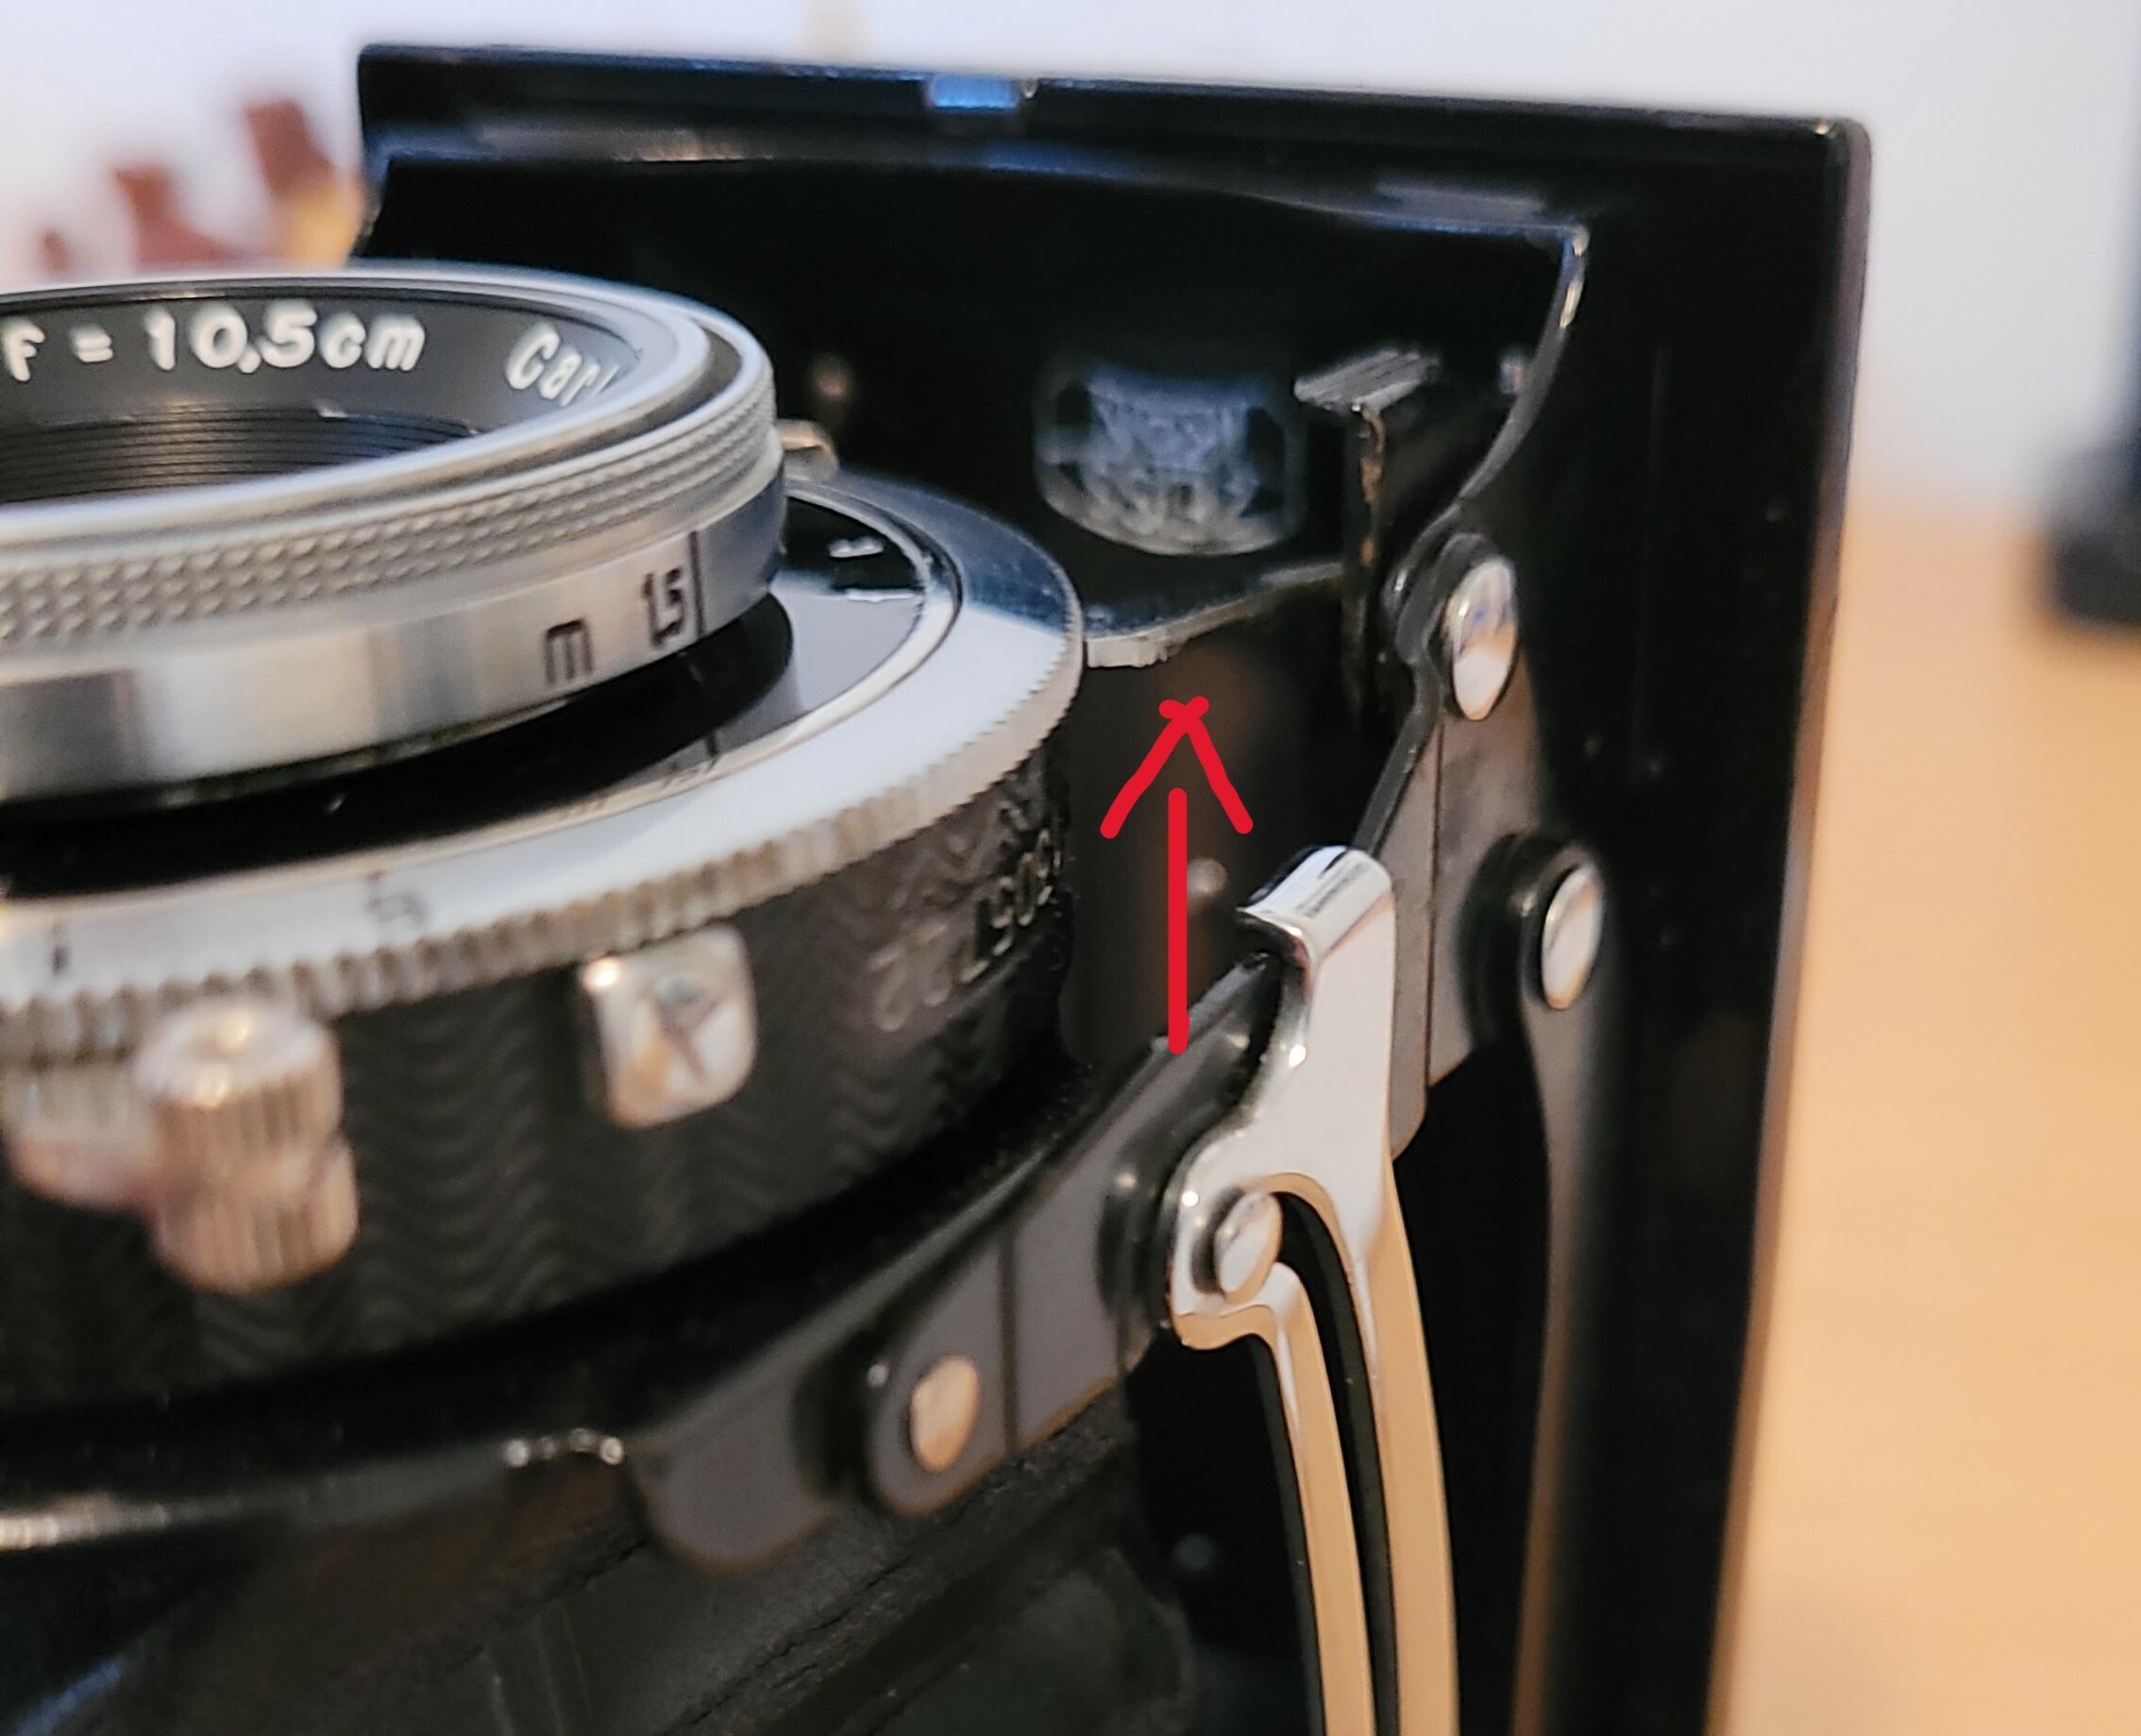
Once you’ve completed these steps, you’re ready to take a photograph that captures not just an image but a piece of history.
Thanks for reading. Leave a comment and/or give it a like.
If you find value in my content, consider supporting me with a virtual coffee ☕️ or a beer 🍺. Your contributions help keep this blog thriving. — © 2024 Henry


